Getting started
Pageimprove integrates via JavaScript code snippet and applies changes directly to the DOM elements. To correctly interact with React-based single-page applications, we provide dedicated integration.
Why is there dedicated integration for React apps
The main reasons for this integration are:
- To ensure that Pageimprove changes the DOM after the main application is rendered.
- To let the main application change the DOM elements that have already been changed by Pageimprove in a non-conflicting way.
- To let Pageimprove roll back the changes upon navigation via History API.
Compatibility with different versions of React
This integration is only tested with React 16.3.0+.
Step 1. Install JS snippet on the site
- Select the tab “React-based app.”
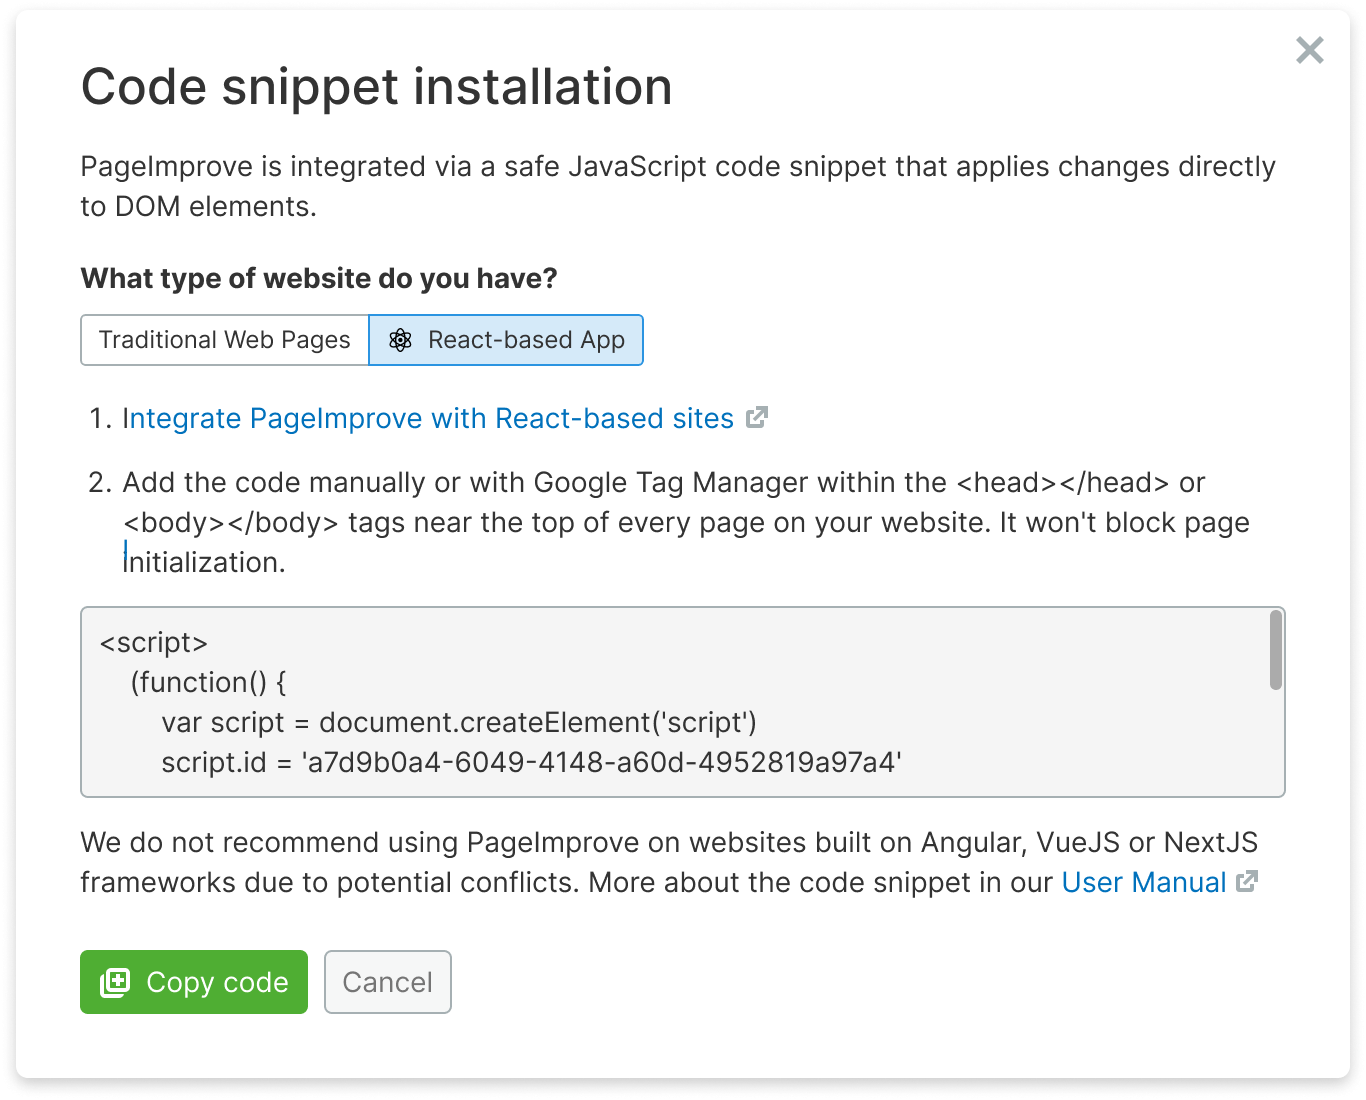
- Copy the code snippet and install it on your website.
Where to put the code snippet on the page
The best place to put the snippet on the page is the <head> tag. The earlier the script is loaded, the faster you will be able to apply the experiment changes.
It is also possible to install the code snippet via a tag management solution like Google Tag Manager, but this will delay the initialization of the experiment, potentially harming the bot and user experience.
Step 2. Integrate Pageimprove with the React application
After the code snippet is installed on the website, we must connect it to the main React application. The point is to let Pageimprovel’s code know when the page is ready to be changed, so it can safely apply the A/B test to the finalized DOM.
By triggering the event “pageimprove.initialized”, we tell Pageimprove that the page is ready to be changed.
Requirements
-
It is very important that the event “pageimprove.initialized” is emitted only after the main app is fully rendered.
Otherwise, the main app might overwrite the changes if it’s rendered after Pageimrpove has already changed the DOM. -
The event must be emitted both after the first load of the application and after the navigation to a new URL.
This way, Pageimprove will be able to roll back the test changes when the user navigates to another page.
Examples
Using react-router v5:
import {useLayoutEffect, Fragment} from 'react'
import {useLocation} from 'react-router'
import {Router} from 'react-router-dom'

const LocationWatcher = ({children}) => {
  // Location is an immutable representation of native history object. It changes at the same time as path, state, hash, etc. changes
  const location = useLocation()

  // You could use useEffect if you want to. useLayoutEffect is just a bit faster and gives us a chance to perform changes within 1-2 screen frames, which makes the transition barely noticeable
  useLayoutEffect(
    () => {
      // This will handle the case when Pageimprove is not yet ready to consume events, so it could run immediately
      window.SM_PAGEIMPROVE_READY = true

      window.dispatchEvent(new Event('pageimprove.initialized'))
    },
    [location]
  )

  return <>{children}</>
}

export const Root = () =>  (
  <Router {...anyProps}>
    <LocationWatcher>
      {...}
    </LocationWatcher>
  </Router>
)
Using react-router v6:
import {useLayoutEffect, Fragment} from 'react'
import {BrowserRouter, useLocation} from 'react-router-dom'

const LocationWatcher = ({children}) => {
const location = useLocation()

useLayoutEffect(
  () => {
      window.SM_PAGEIMPROVE_READY = true

      window.dispatchEvent(new Event('pageimprove.initialized'))
    },
    [location]
  )

  return <>{children}</>
}

export const Root = () =>  (
  <BrowserRouterter {...anyProps}>
    <LocationWatcher>
      {...}
    </LocationWatcher>
  </BrowserRouter>
)
If you don’t use react-router:
Use the following function and call it from your router after the React app rendered the page and after every render of the new page (e.g. when the user navigates via History API).
const invokePageimprove = () => {
    // This will handle the case when Pageimprove is not yet ready to consume events, so it could run immediately
    window.SM_PAGEIMPROVE_READY = true

    window.dispatchEvent(new Event('pageimprove.initialized'))
}
Step 3. Check that everything works correctly
1. Using the browser console in the developer environment
By default, Pageimrpove code snippet doesn’t write any logs to the browser console. To make it do so, turn on “debug mode” by setting the global variable window.SM_PAGEIMPROVE_DEBUG = true.
The variable must be set before the Pageimprove code snippet is loaded.
window.SM_PAGEIMPROVE_DEBUG = true;
After the flag is set, Pageimprove will start writing debug messages to the console.
Here is the list of cases when Pageimprove writes a message to the console:
-
When the code snippet is loaded
-
When the code snippet consumed the event “pageimprove.initialized"
-
When the code snippet is loaded, but there are no “pageimprove.initialized” events for 7 seconds.