Content Optimizer is a content enhancement tool inside the Semrush Content Toolkit.
It evaluates your content drafts across three key areas: SEO, readability, and tone of voice—all in one place.
You’ll get targeted suggestions in each category and see your scores update in real time as you apply improvements.
Once your piece is ready, you can export it to Google Docs, publish directly to WordPress, or share a read-only link.
How Can Content Optimizer Help Me?
With Content Optimizer, you can:
- Update and improve your existing content
- Score your drafts for SEO, readability, and tone of voice
- Optimize for AI search visibility with specific checks for Generative Engine Optimization (GEO)
- Watch your scores update in real time as you apply improvements
- Expand your drafts using an integrated AI chat trained on your article
- Generate AI images and add royalty-free stock images
- Customize SEO, readability, and tone settings based on your preferences
- Generate title tags and meta descriptions, and edit them anytime
All this helps you boost your page rankings and get more engagement with minimum effort.
How to Use Content Optimizer
Here’s a step-by-step guide to optimizing your content within the Content Toolkit:
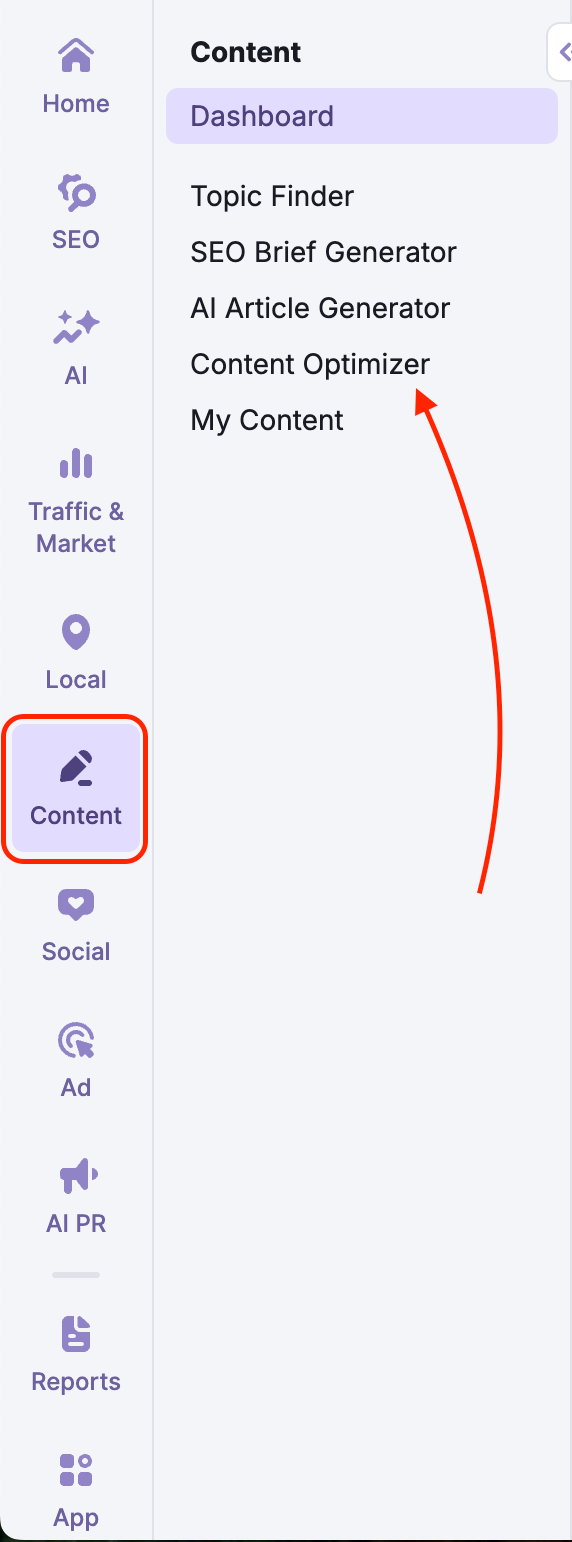
Step 1: Open Content Optimizer
Access Content Optimizer from the Content Toolkit.
Step 2: Set Up the Optimizer
Upload your existing content manually.
Then, within the SEO section, add your target keywords (at least three) and audience location to tailor the suggestions.
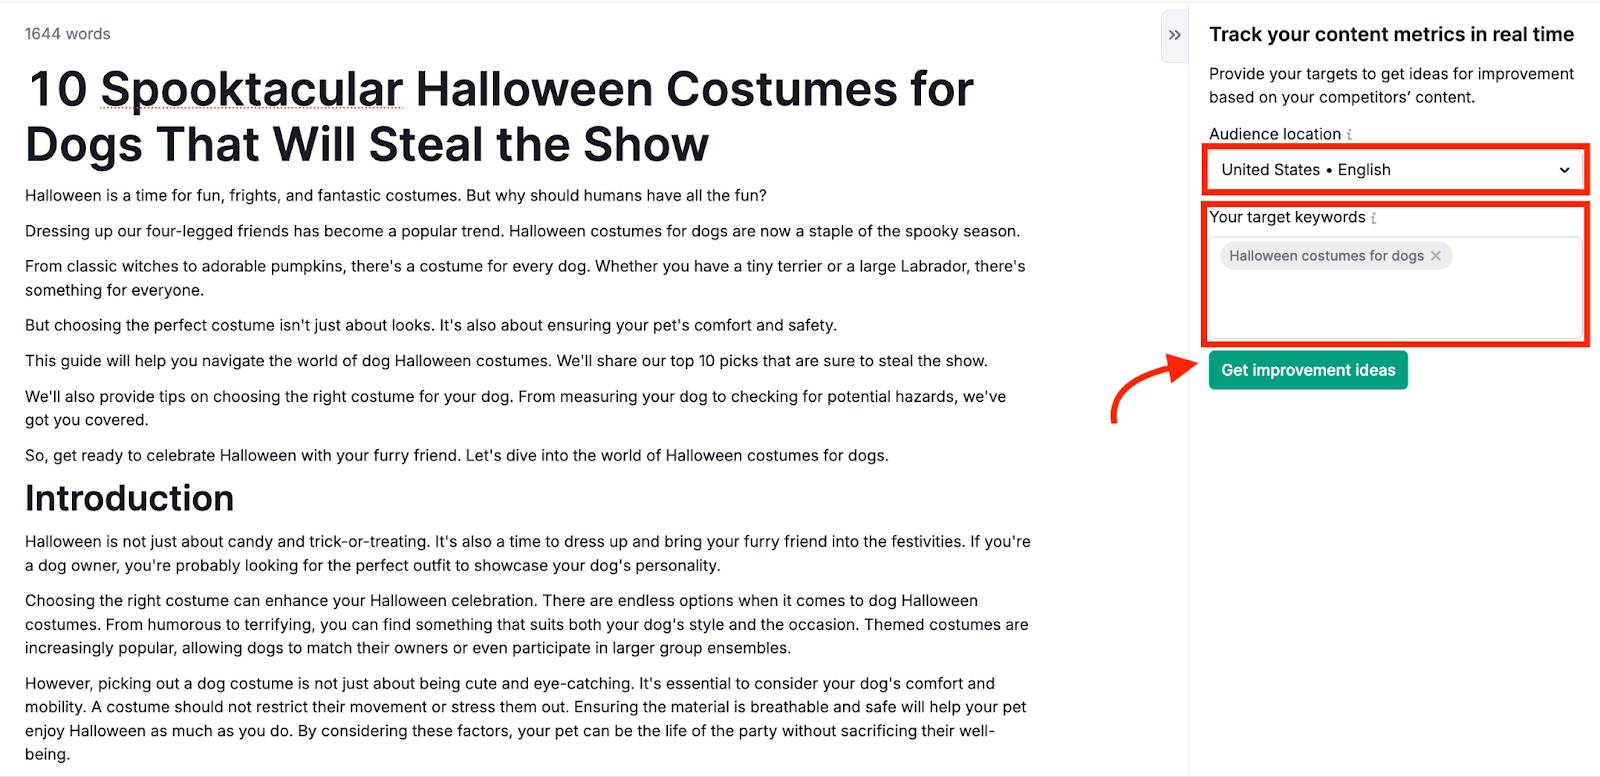
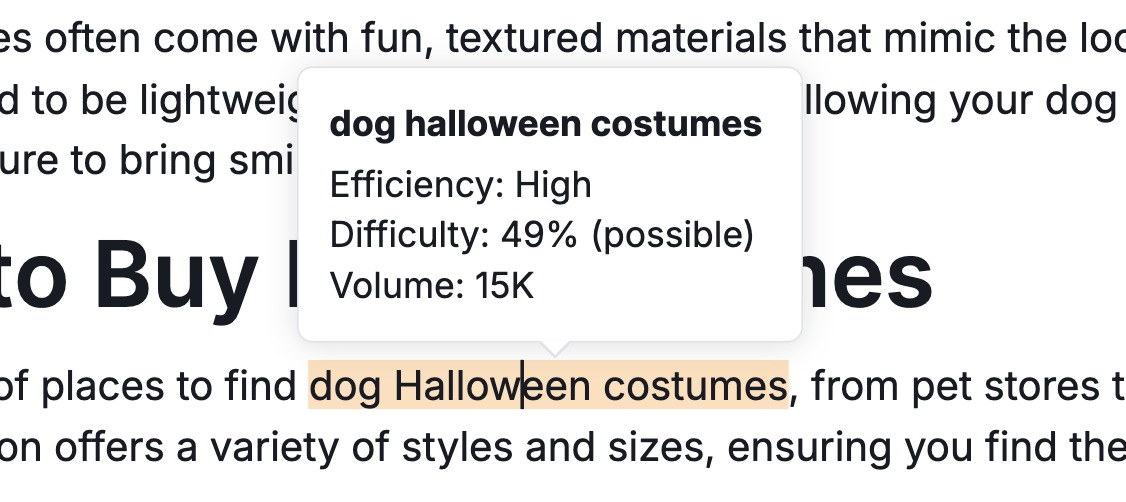
These keywords will be highlighted inside your draft, so you can easily track their placement as you make edits.
Step 3: Get Your Content Scored
Content Optimizer will automatically analyze your draft and generate an overall performance score. Like this:

The tool generates performance scores across three key areas:
SEO: Keyword coverage, metadata, alt tags, and topical relevance

Readability: Sentence length, structure, and ease of reading

Tone of voice: Tone consistency

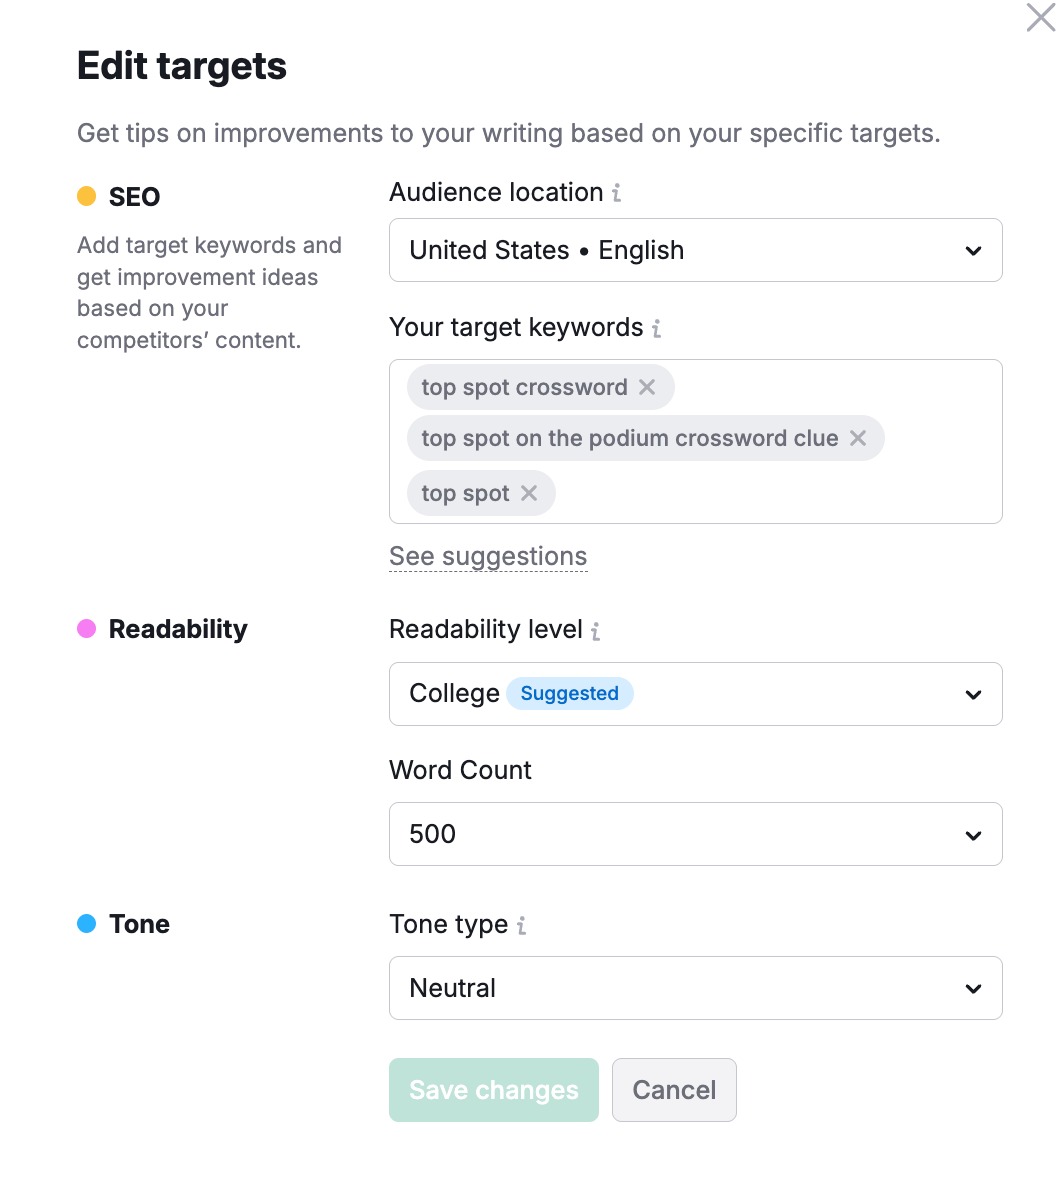
Click “Edit targets” to customize scoring targets at any time. This includes:
- Audience location
- Target keywords
- Readability level
- Word count
- Tone type
You can also use the “Improve” button to automatically fix some of the issues highlighted in these sections, such as improving your title, adjusting the target keywords, or reducing keyword stuffing.

Step 4: Review Suggestions
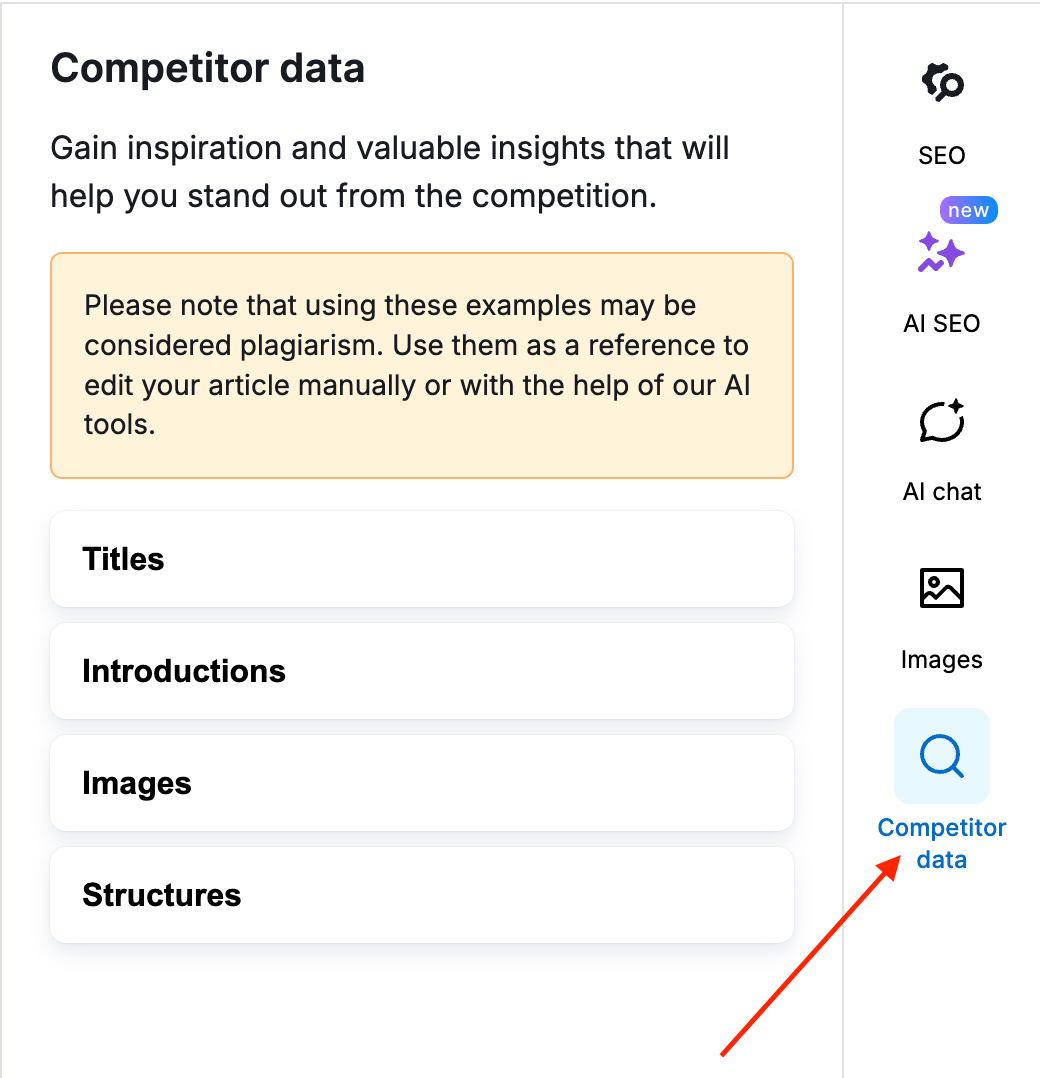
You’ll get a detailed list of improvement suggestions based on top SERP competitors in your region.
See opportunities to:
- Add missing keywords
- Add missing alt texts
- Fix readability issues
- Adjust tone to match your Brand Voice
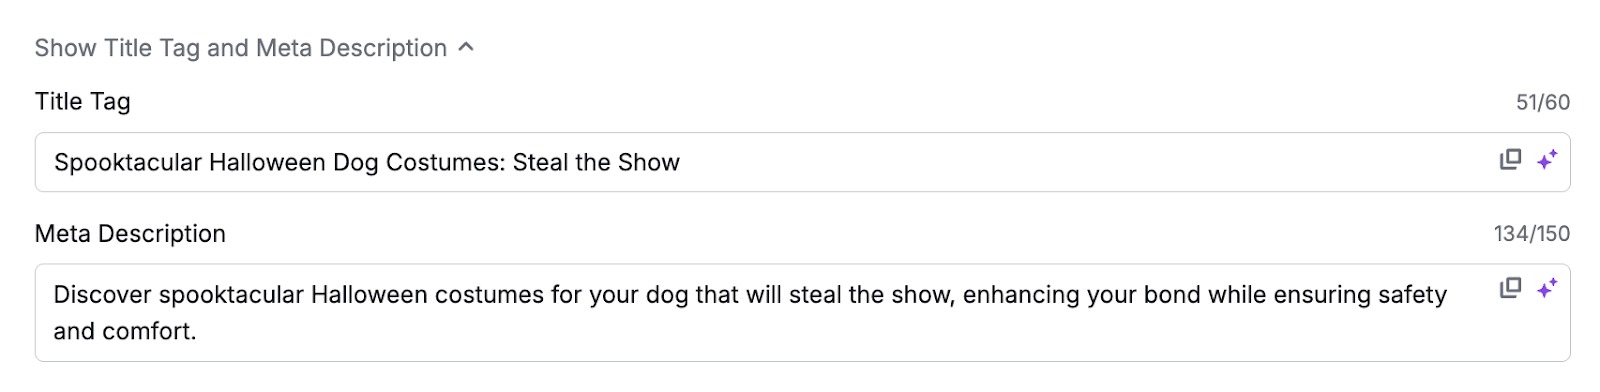
You’ll also find the option to generate a title tag and meta description for the post right at the top of the editor. You can further tweak them manually or regenerate them based on your preference.
Visual callouts highlight areas to revise. Click any sentence or paragraph and apply instant AI-powered edits, such as:
- Rewrite: Improve sentence clarity and structure
- Simplify: Make complex ideas easier to understand
- Expand: Add more details
- Summarize: Condense long paragraphs
- Make a list: Turn dense text into scannable bullet points

You will also find the option to generate a Title Tag and Meta Description for the post right at the top of the editor.
These are automatically generated along with your article, but you can tweak them manually or click the sparkle icon to regenerate them using AI.

Step 5: Add More Content
Use the integrated AI Chat to expand your content and make it more comprehensive. For example, you can add new content sections, brainstorm title ideas, and more.

You can also compare your content with top-ranking pages and identify any gaps using the Competitor Data tab.
Step 6: Manage Article Structure
You can quickly view your article's structure and navigate between sections using the dropdown menu on the left side of the editor.
The menu offers two states:
- Compact view: Displays a streamlined outline of your structure.
- Expanded view: Hover over the menu to see a detailed look at your current headings.
Use this menu to track your outline and adjust heading levels (H1, H2, H3) with just a few clicks.

Step 7: Optimize for AI Search
Content Optimizer includes a dedicated AI SEO tab. This helps you optimize your content for visibility in AI-powered search tools (like ChatGPT, Google Gemini, and Perplexity) and AI overviews.
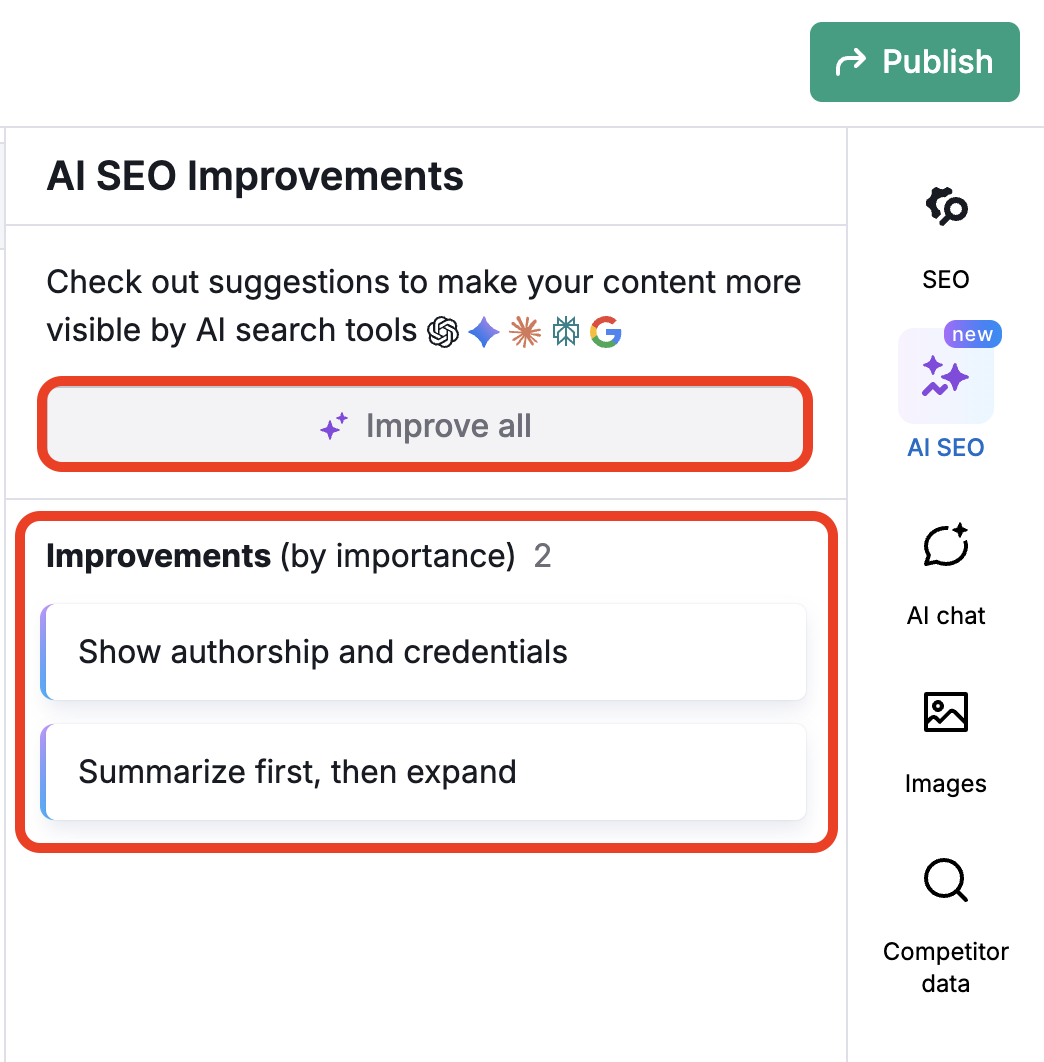
The AI SEO check runs automatically right after you generate or import an article. You can also run it manually by opening the AI SEO tab in the right-hand sidebar and clicking Check for improvements.
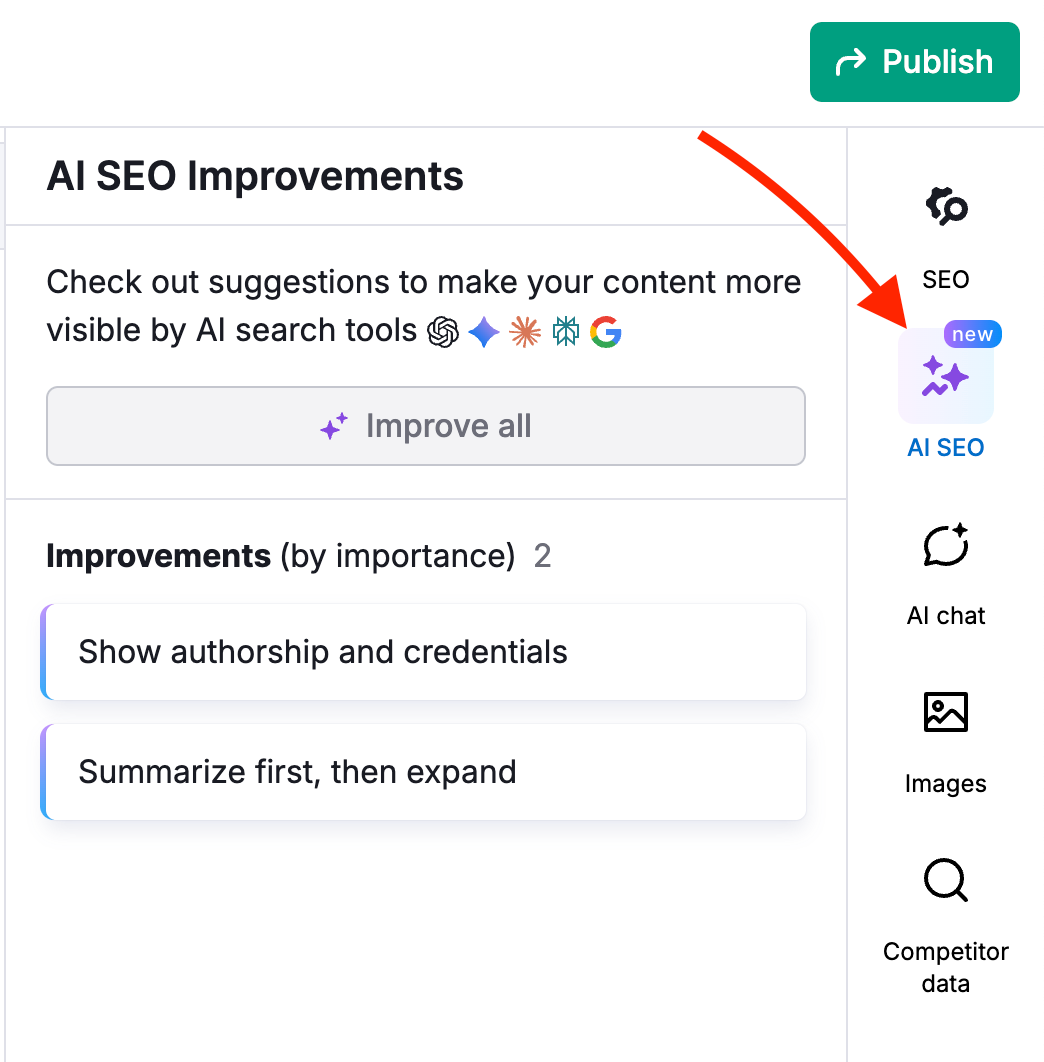
You can apply individual suggestions, or click Improve all to implement all suggestions at once.
The tool runs five specific checks to ensure your content is structured for AI comprehension:
- Clarity and summarization: Ensures your content is easy for AI to digest and summarize.
- E-E-A-T: Checks for Experience, Expertise, Authoritativeness, and Trustworthiness signals.
- QA format: Verifies if your content answers questions directly (a key factor for AI citations).
- Section structure: Analyzes your header hierarchy and logical flow.
- Structured data score: Checks for schema markup that helps machines understand your content.
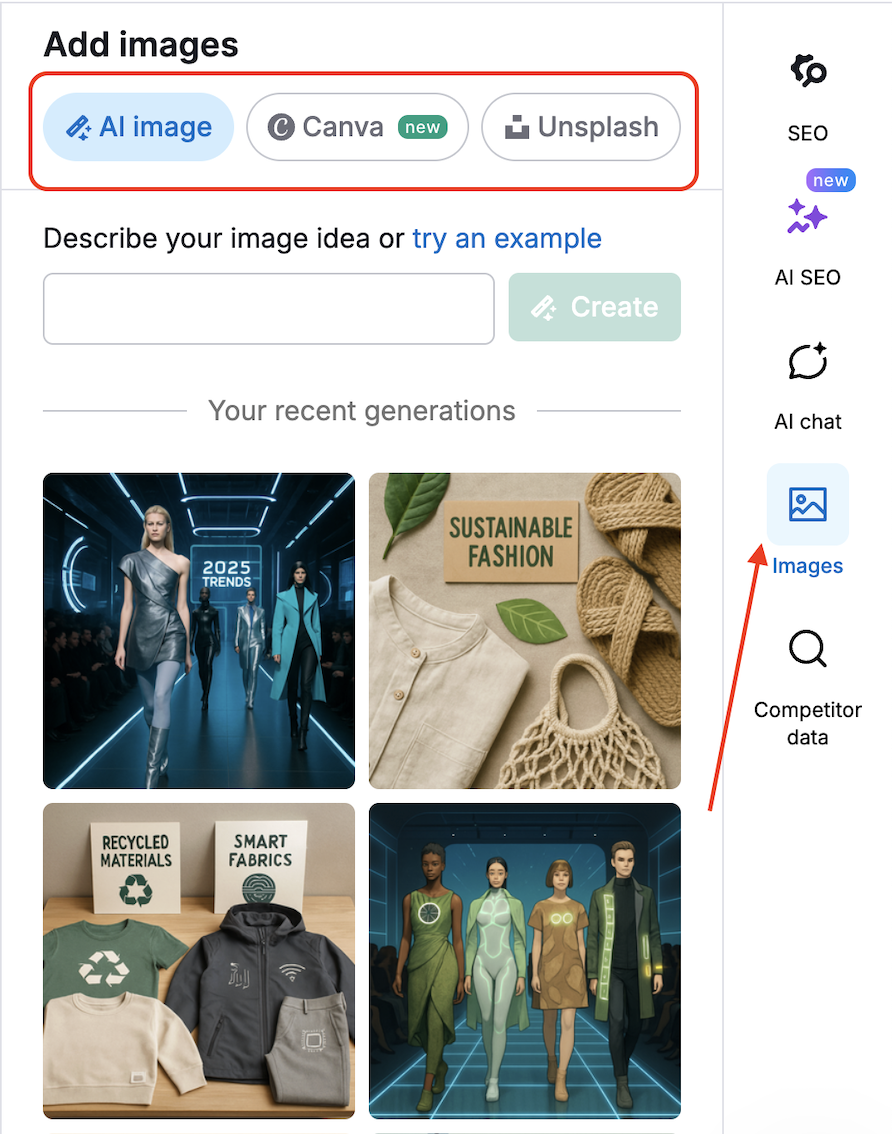
Step 8: Add Visuals and Final Polish
Generate custom visuals using the integrated AI Image Generator or select royalty-free images from the built-in library.
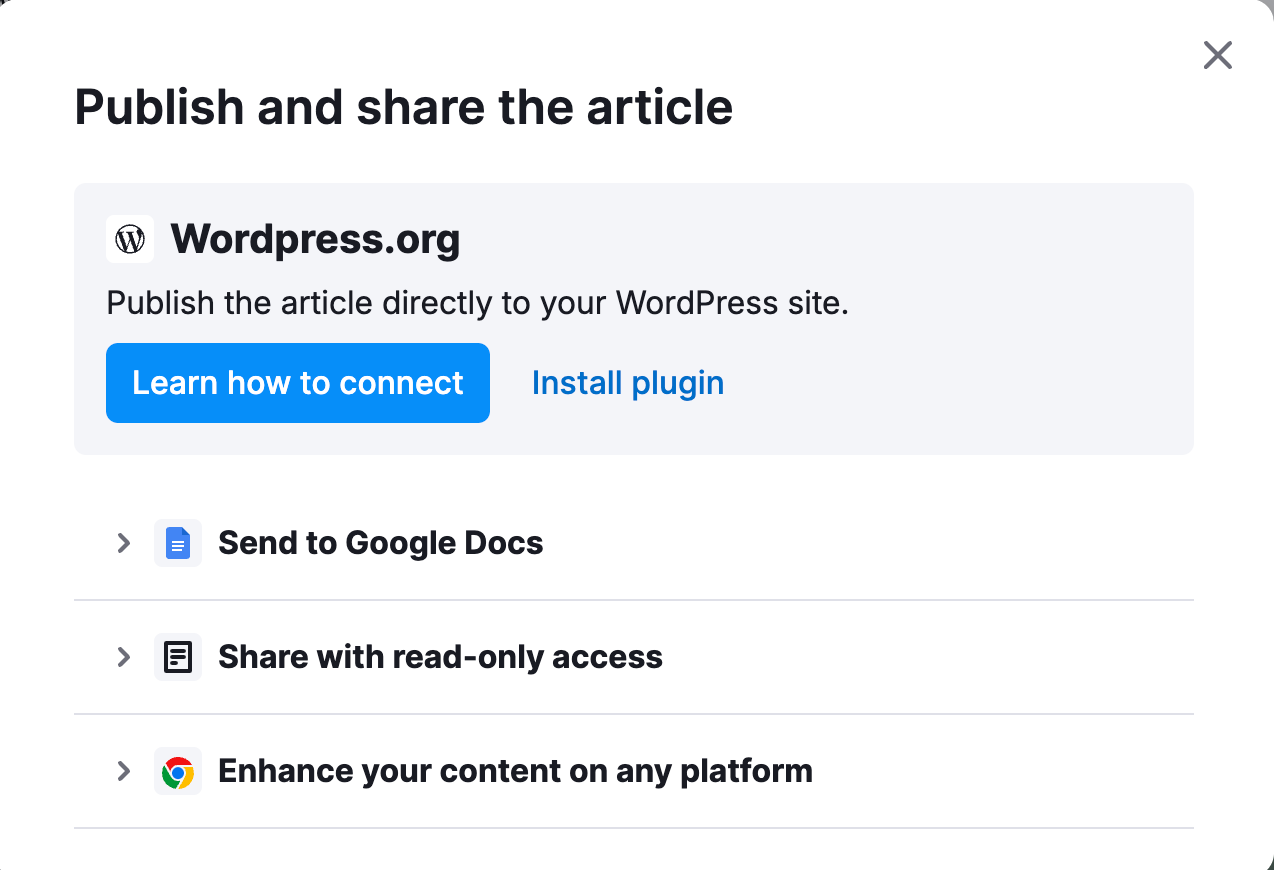
Step 9: Finalize and Export
Once you're done optimizing, choose how to share or publish:
- Publish directly to WordPress
- Export to Google Docs
- Share a read-only link
- Use the Semrush AI Writer Chrome browser extension to edit, improve, and create content on any website or platform
Note: Title tags and meta descriptions are also included in the exported Google Docs.