AI Backlink Builder is an app by Respona that offers advanced link-building features for agencies and brands with AI-driven personalization, real-time scraping from public sources and integration with other tools to enrich outreach opportunities.
It is a template-based tool that focuses on building high-authority backlinks, recruiting affiliate partners, booking podcast interviews and gaining press coverage. You can find it in the Semrush App Center.
The Benefits of AI Backlink Builder
AI Backlink Builder allows you to streamline your outreach campaigns with a range of intuitive and AI-powered features, the benefits of which improve your link-building, affiliate recruitment, podcast outreach, PR outreach and more.
- Streamline your link-building campaigns with AI personalization
- Scale your outreach with real-time scouring of publicly available sources
- Manage your relationships all in one place with an integrated inbox
- Learn from in-depth analytics to monitor success and adapt accordingly
AI Backlink Builder finds opportunities through multiple sources, such as Google searches, Google News and Semrush competitor backlink data, as well as dedicated integrations like Listen Notes for podcasts.
You can define specific search operators and filters in your queries to target relevant websites. Once these potential opportunities are discovered, the app automatically pulls in metrics such as domain authority and traffic via Semrush to help you qualify and prioritize leads. This blend of flexible search options and SEO metrics ensures that you can focus on the most promising outreach targets for your campaigns.
Pricing and Limits
A subscription to AI Backlink Builder costs $169/month on the Starter plan, which includes 2 email accounts, 10,000 monthly data credits and 30,000 active contacts.
Each result from Google costs 1 credit, while each valid email address identified via real-time search costs 5 credits. Using GPT-4o to personalize emails costs 5 credits, while using GPT-4o mini costs 1 credit per email.
You can add 5,000 extra credits for $50/month. Your limits are reset at the beginning of each billing cycle.
What’s Included in AI Backlink Builder?
The depth and breadth of features in the AI Backlink Builder app are designed to meet your advanced link-building needs at every step of the process. Collectively, the features offer a comprehensive outreach solution, comprising:
- Template-driven campaigns: You can easily create campaigns using pre-built templates that are crafted to achieve various outreach goals
- Automated opportunity identification: The app uncovers opportunities relevant to each of your campaign objectives
- Contact info acquisition: AI Backlink Builder automatically scrapes LinkedIn to find the right person according to their job title and seniority (e.g. Content Manager, SEO Manager)
- AI-powered personalization: You can get tailored, targeted emails based on your recipients’ content to increase deliverability and response rates
- Comprehensive CRM: The built-in CRM allows you to manage relationships effectively from the get-go
- Collaborative unified inbox: You can manage conversations with recipients in a collaborative inbox, which is great for high-intensity users handling campaigns using multiple email accounts and agencies conducting outreach for numerous clients
- Detailed analytics: Get in-depth analytics to track the success of outreach campaigns beyond simple open/reply rates
These features are organized into a navigational menu you can access on the left-hand side of your screen in AI Backlink Builder.
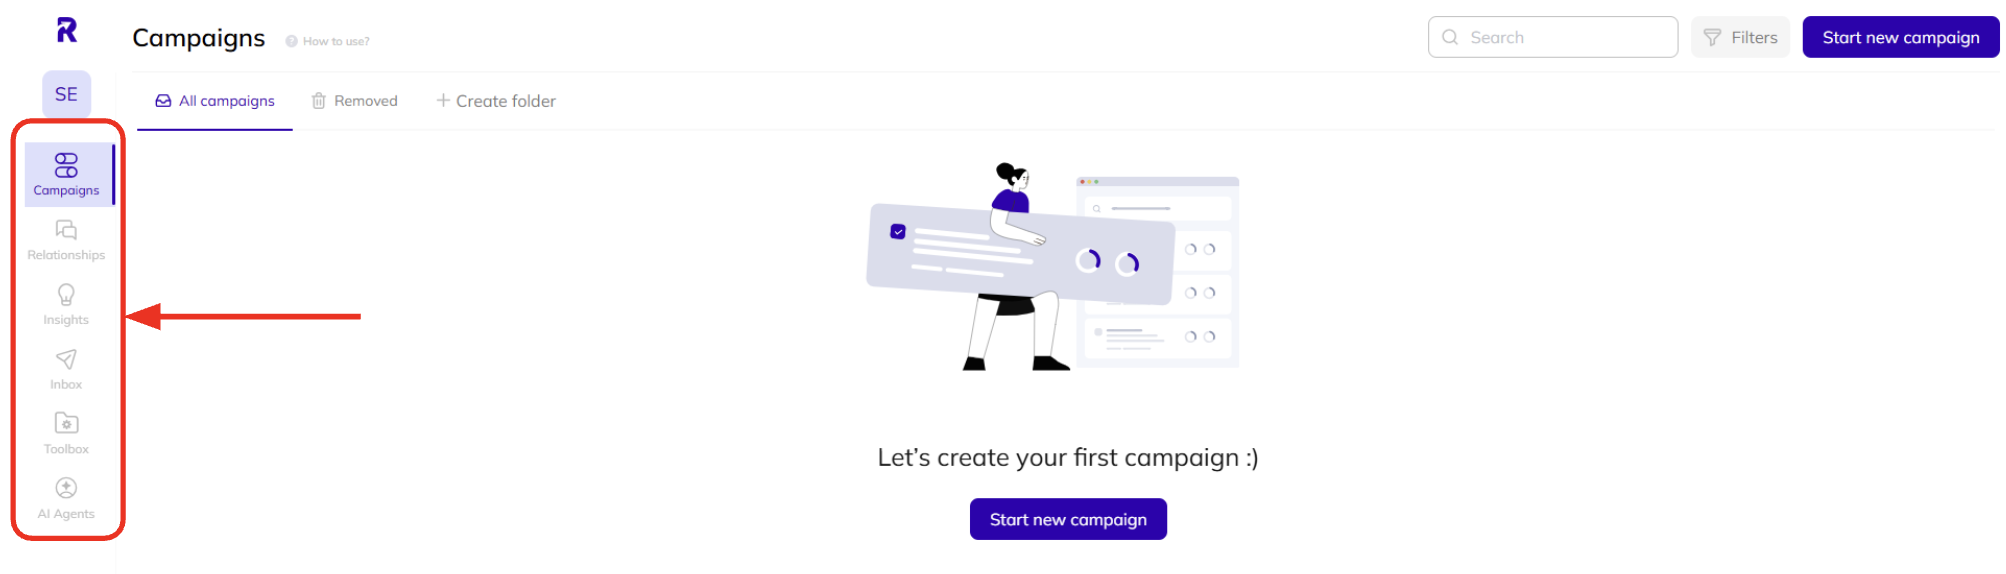
Campaigns
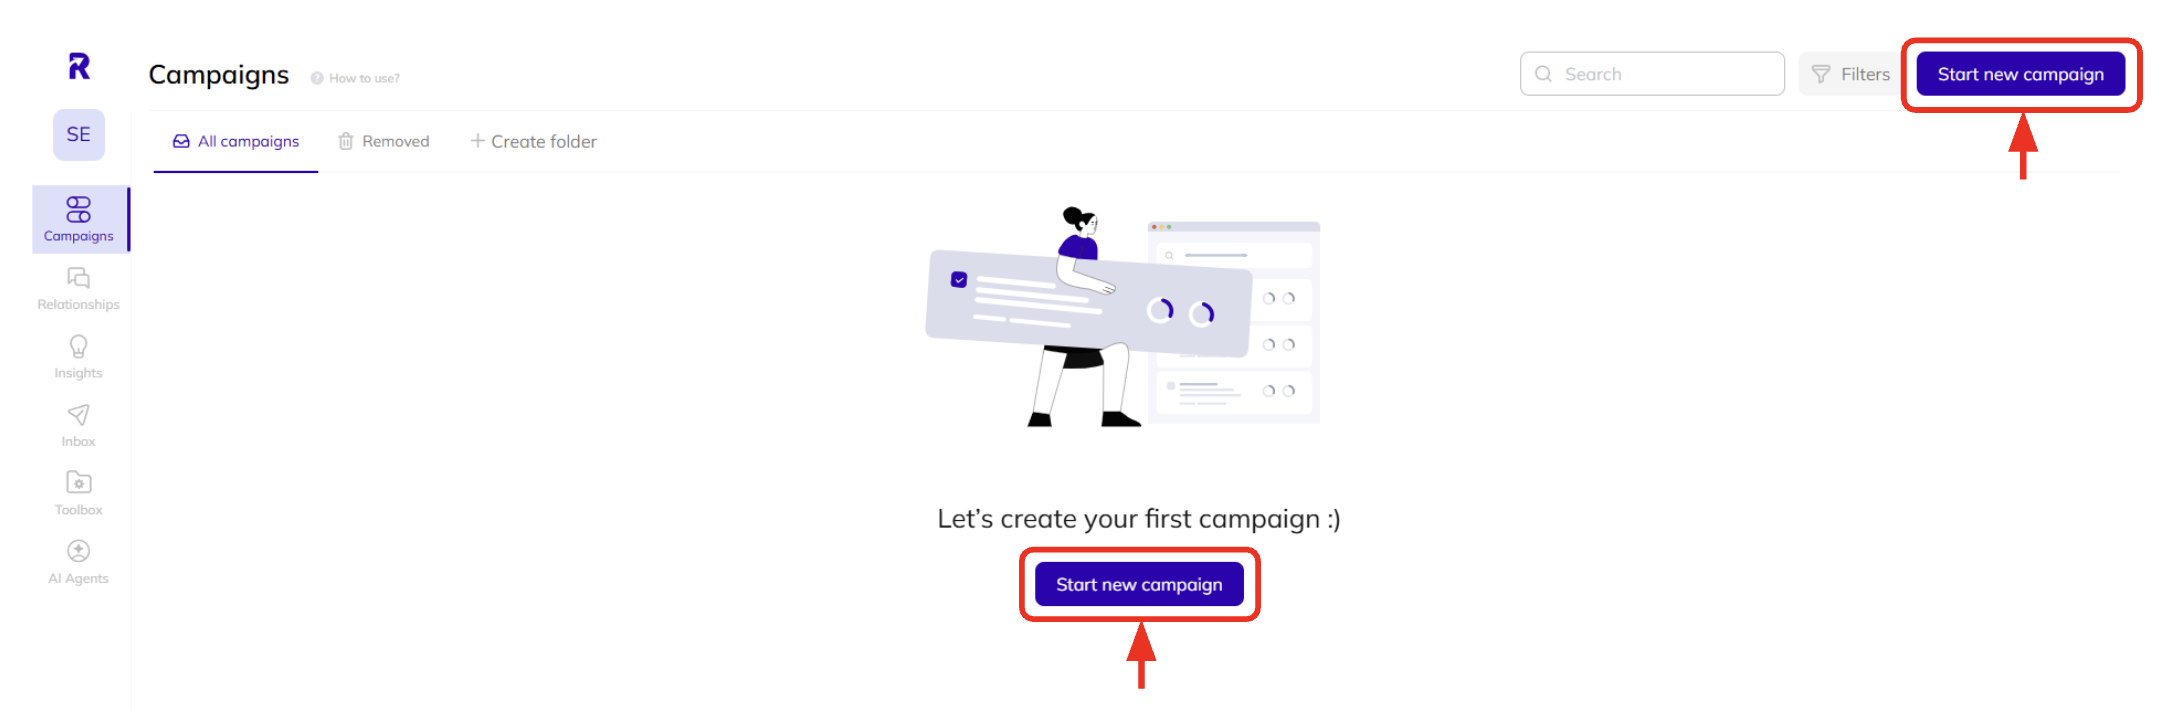
To get started, click ‘Start new campaign’ either in the middle or at the top-right of your screen.
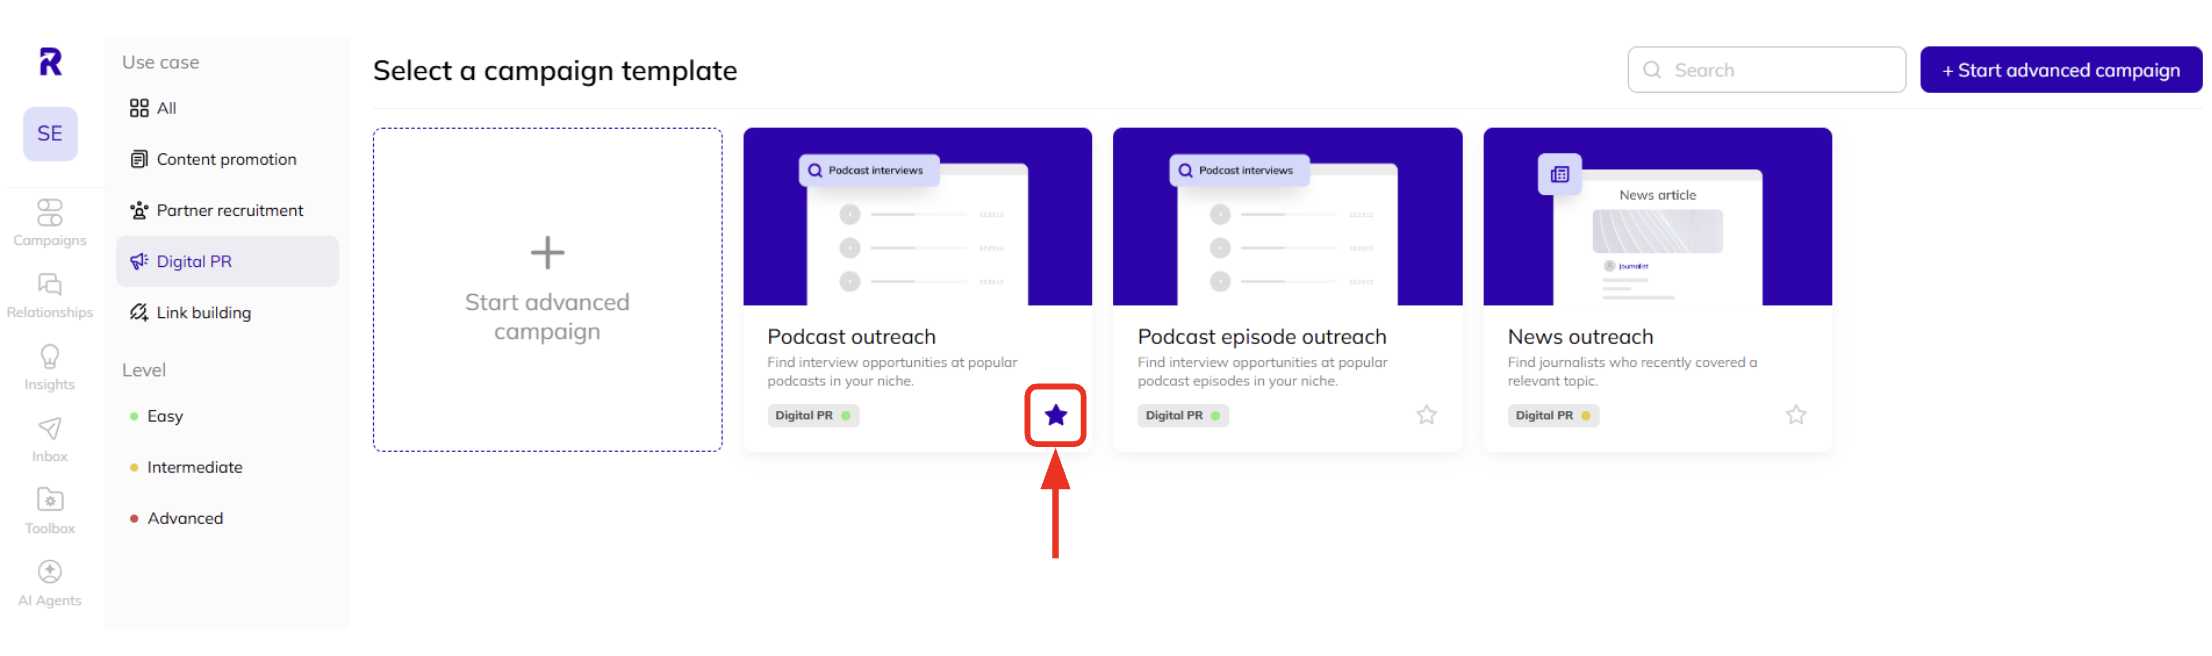
You’ll be taken to AI Backlink Builder’s catalog of campaign templates, which you can filter by use case or level of difficulty using the left-hand options—each tile will contain a title and a brief description of the goal the template will help you reach.
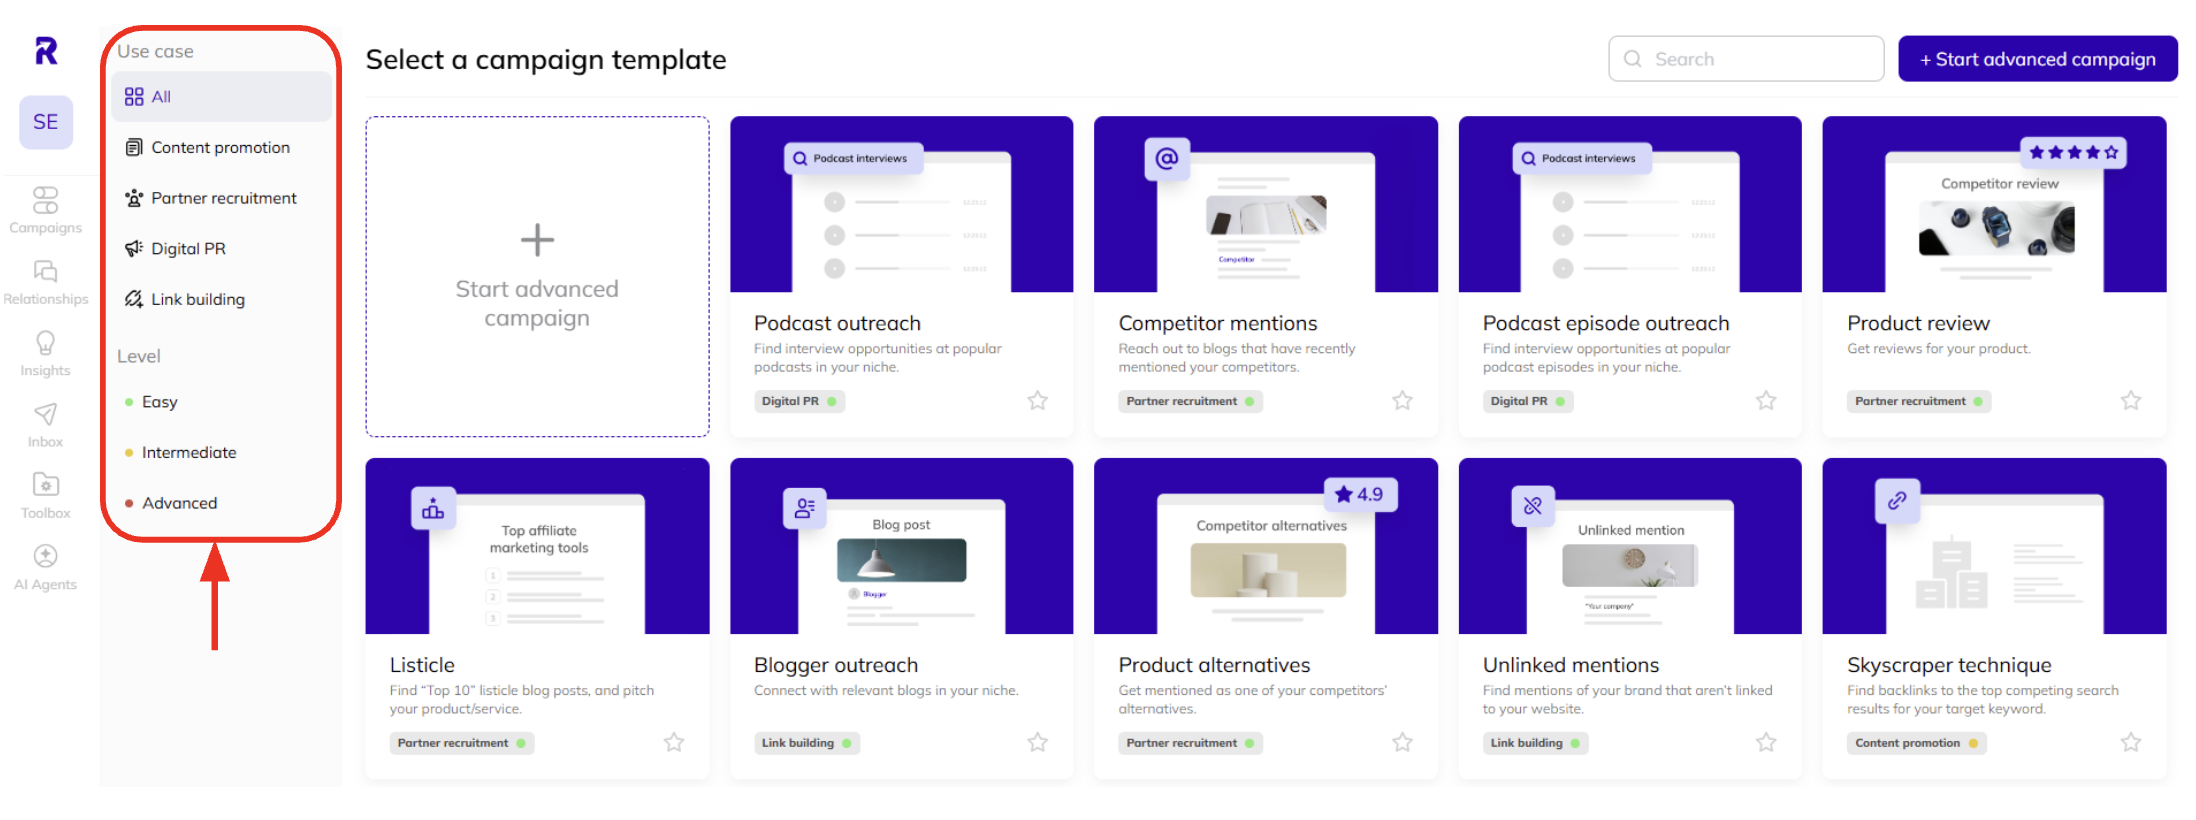
You can add the templates you like to your favorites for easy access using the star button on the tile.
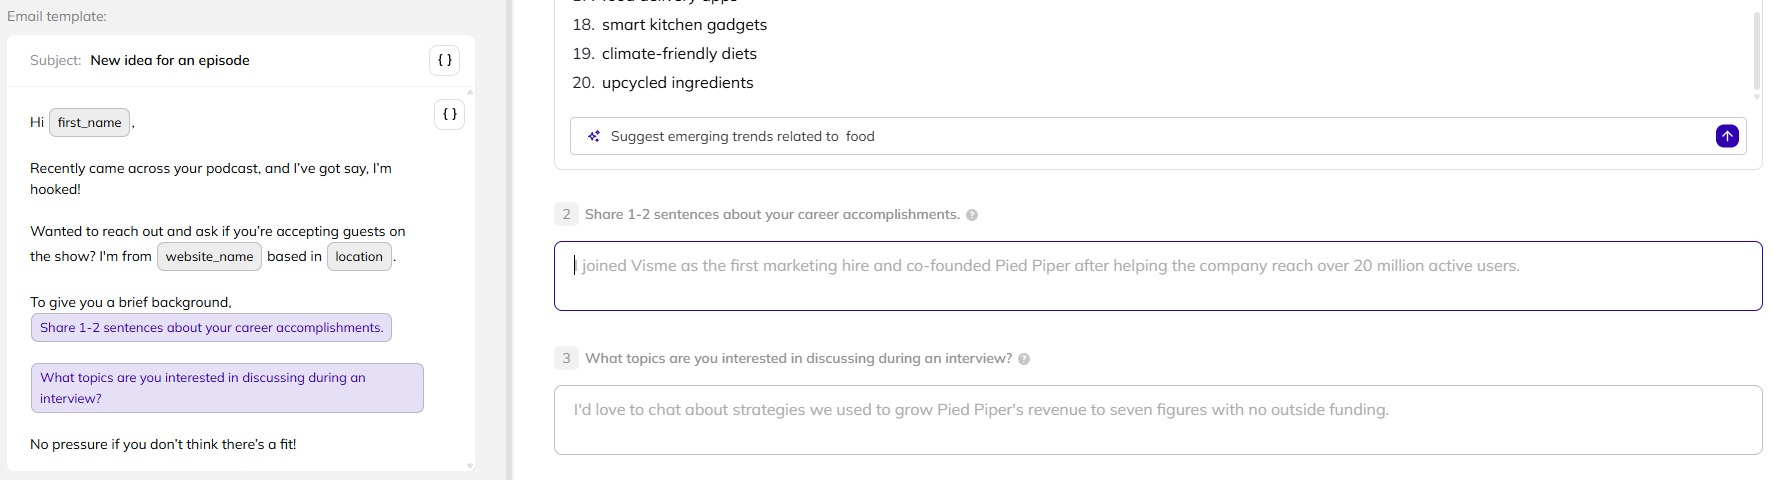
Clicking on a tile will take you to the template page for you to start building your outreach plan. This will include the email template on the left-hand side and a series of questions for you to answer on the right-hand side—fill out your answers in the boxes provided and click ‘Use this template’ to proceed.

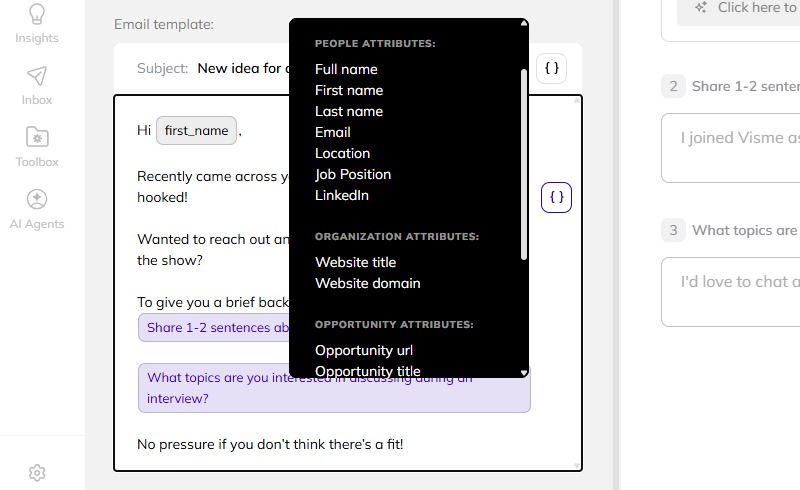
To edit your email template before you move ahead—for example, you might add a custom subject line and a couple of attributes, like [website_name] and [location]—simply click into the editable text box or on the brackets icon to reveal your options.
You can ask AI for keywords to fill out your answer, such as in this Podcast outreach example:
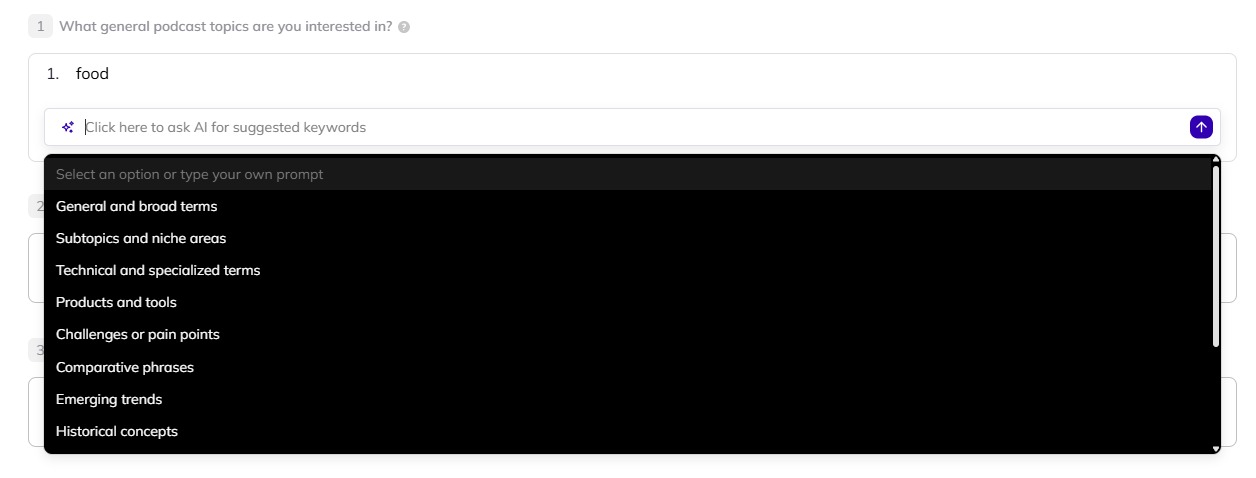
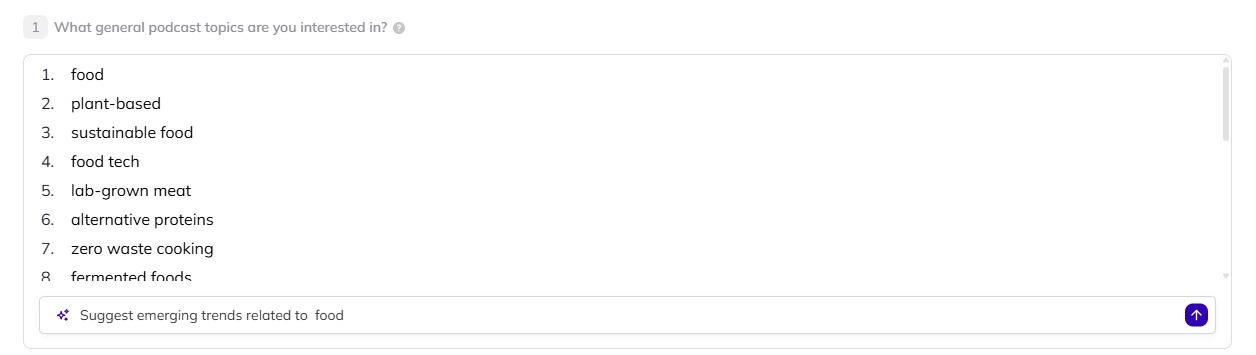
Choose a prompt or start typing to supply your own—if you select ‘Emerging trends,’ for instance, you can then command the AI to suggest emerging trends related to [keyword]. So, you might add the keyword ‘food’ to this box and then click the purple arrow on the right-hand side of your screen to add related keywords to your list. If any of the suggestions don’t work for you, simply delete them from the text box.
For the other questions, the answers you type will appear in the purple boxes in the email template on the left-hand side.
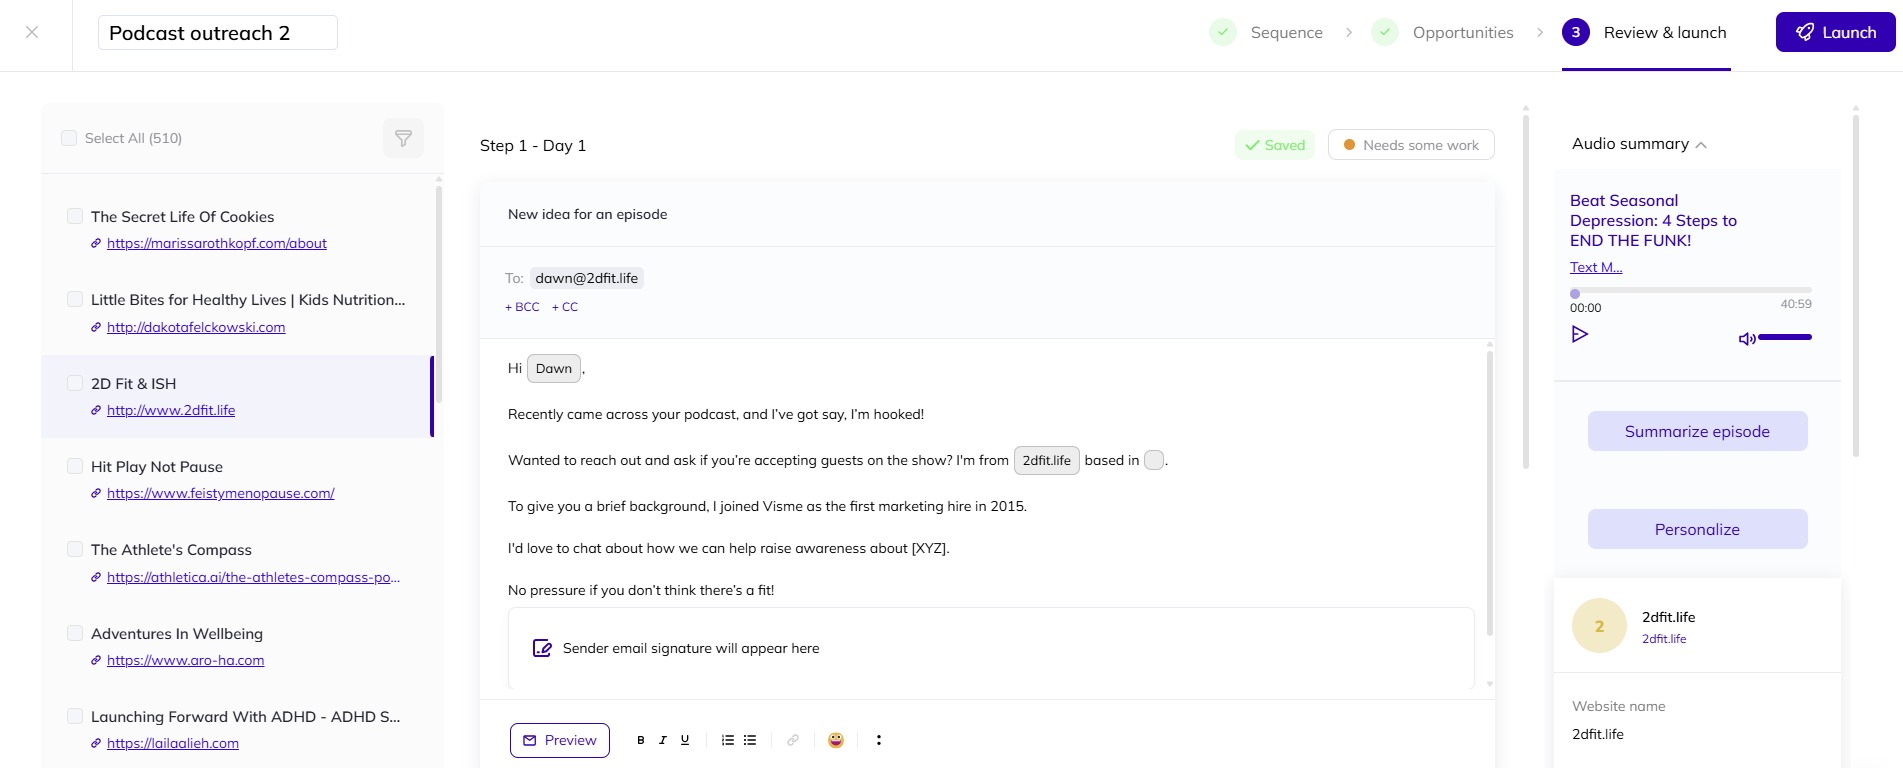
Once you click ‘Use this template,’ you’ll be taken to the campaign builder, where you’ll be able to set your email sequence step by step on the left-hand side and make further amendments to your content in the main (central) window. You can also edit the name of the outreach campaign in the top-left text box and save and close it at any point using the ‘x’ button to the left.
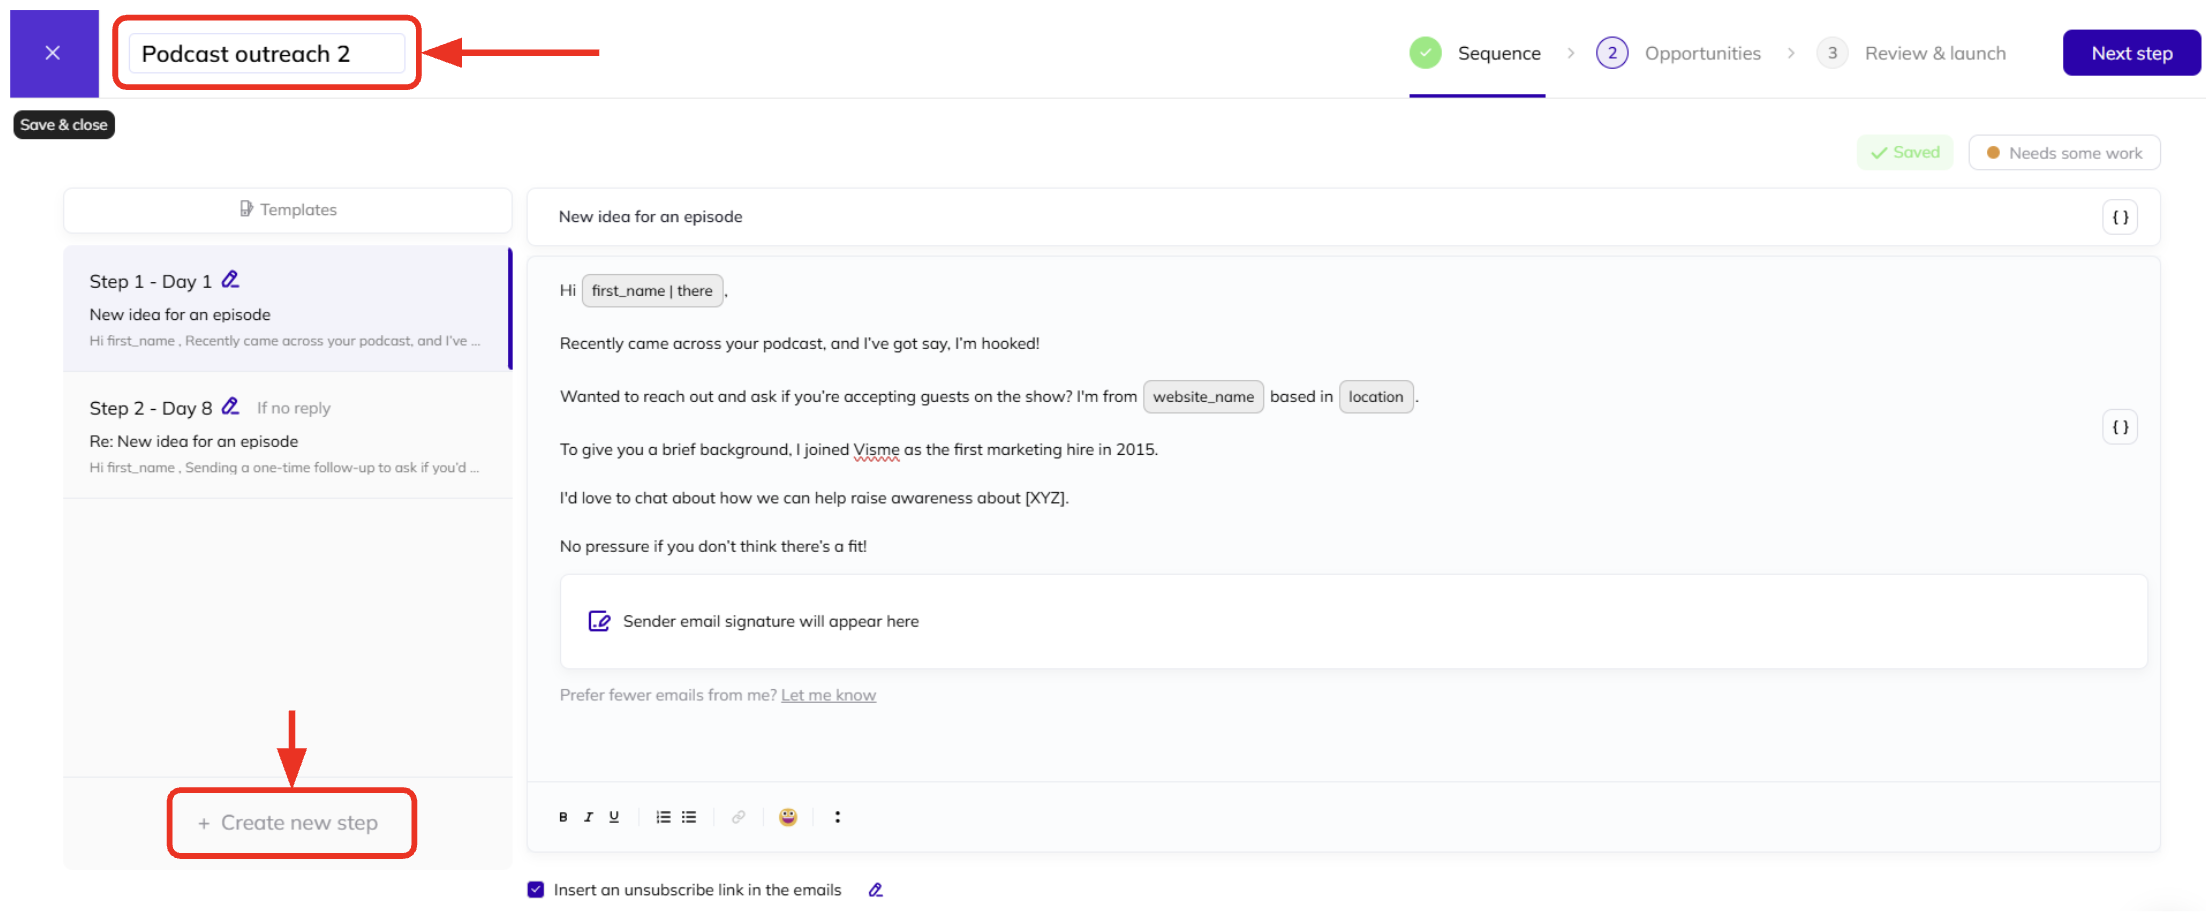
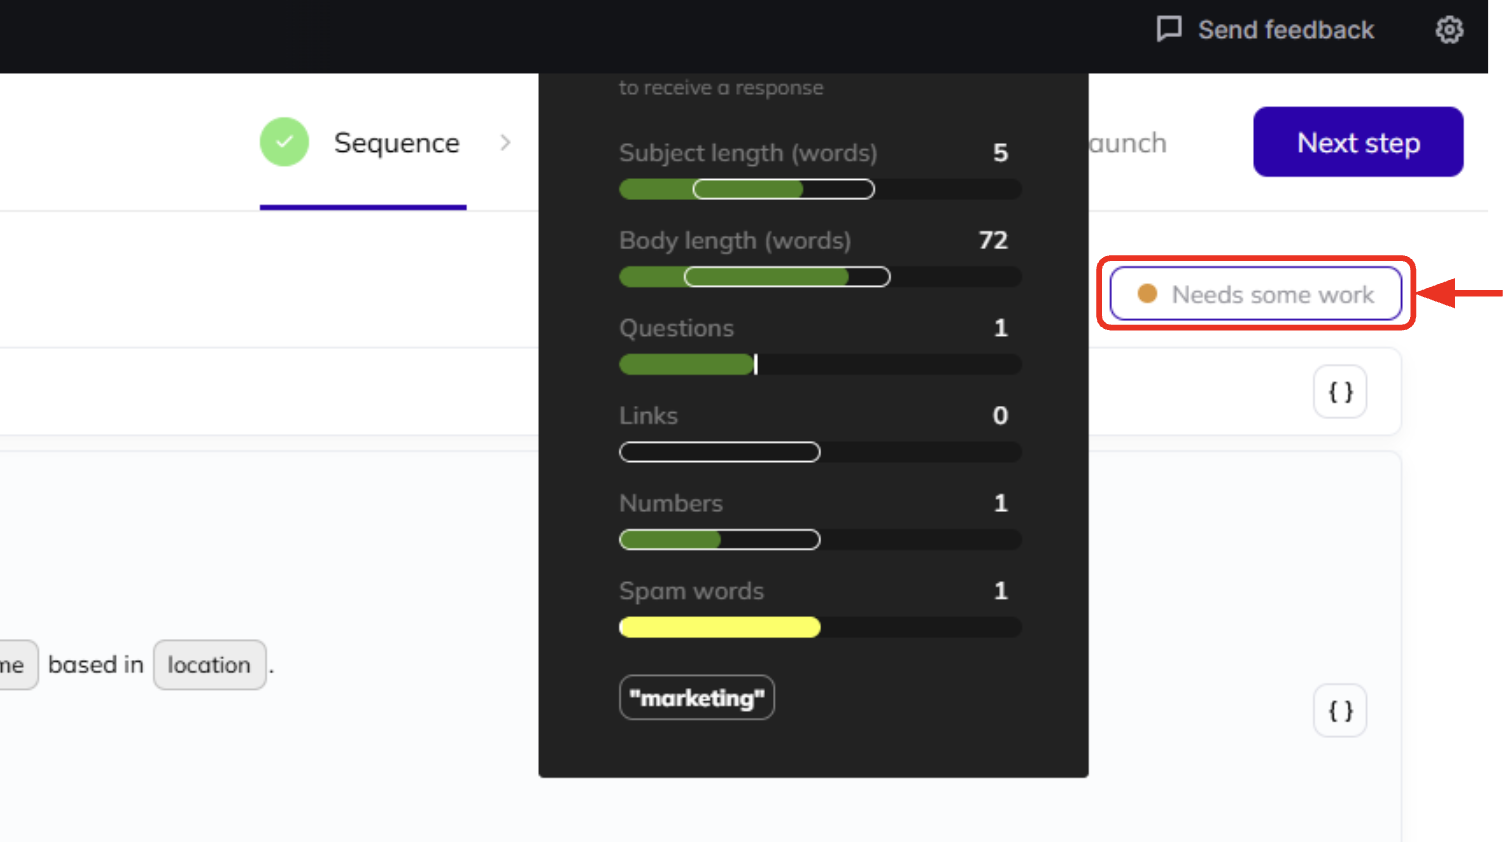
You can find a summary of the status of your email by hovering over the button with the colored dot in it at the top right. This will provide guidance to improve your email and enhance your chances of getting a reply.
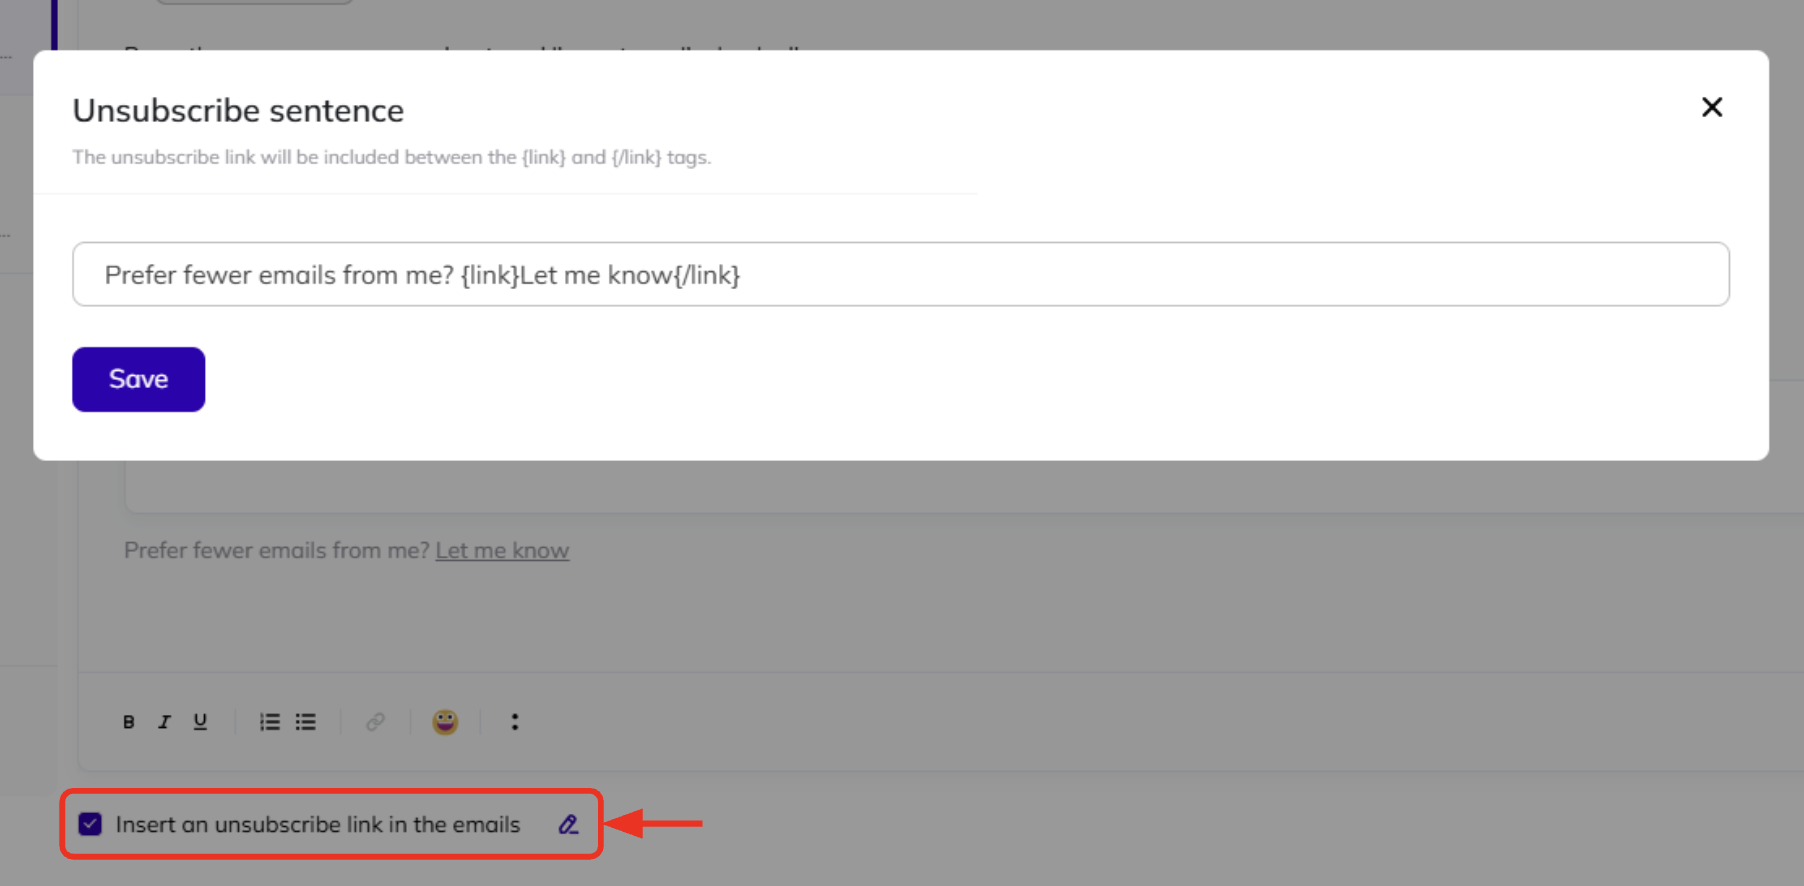
To give recipients the option to unsubscribe from your emails, ensure the check box at the bottom is ticked—you can edit the text they will see by clicking the pencil icon to the right.
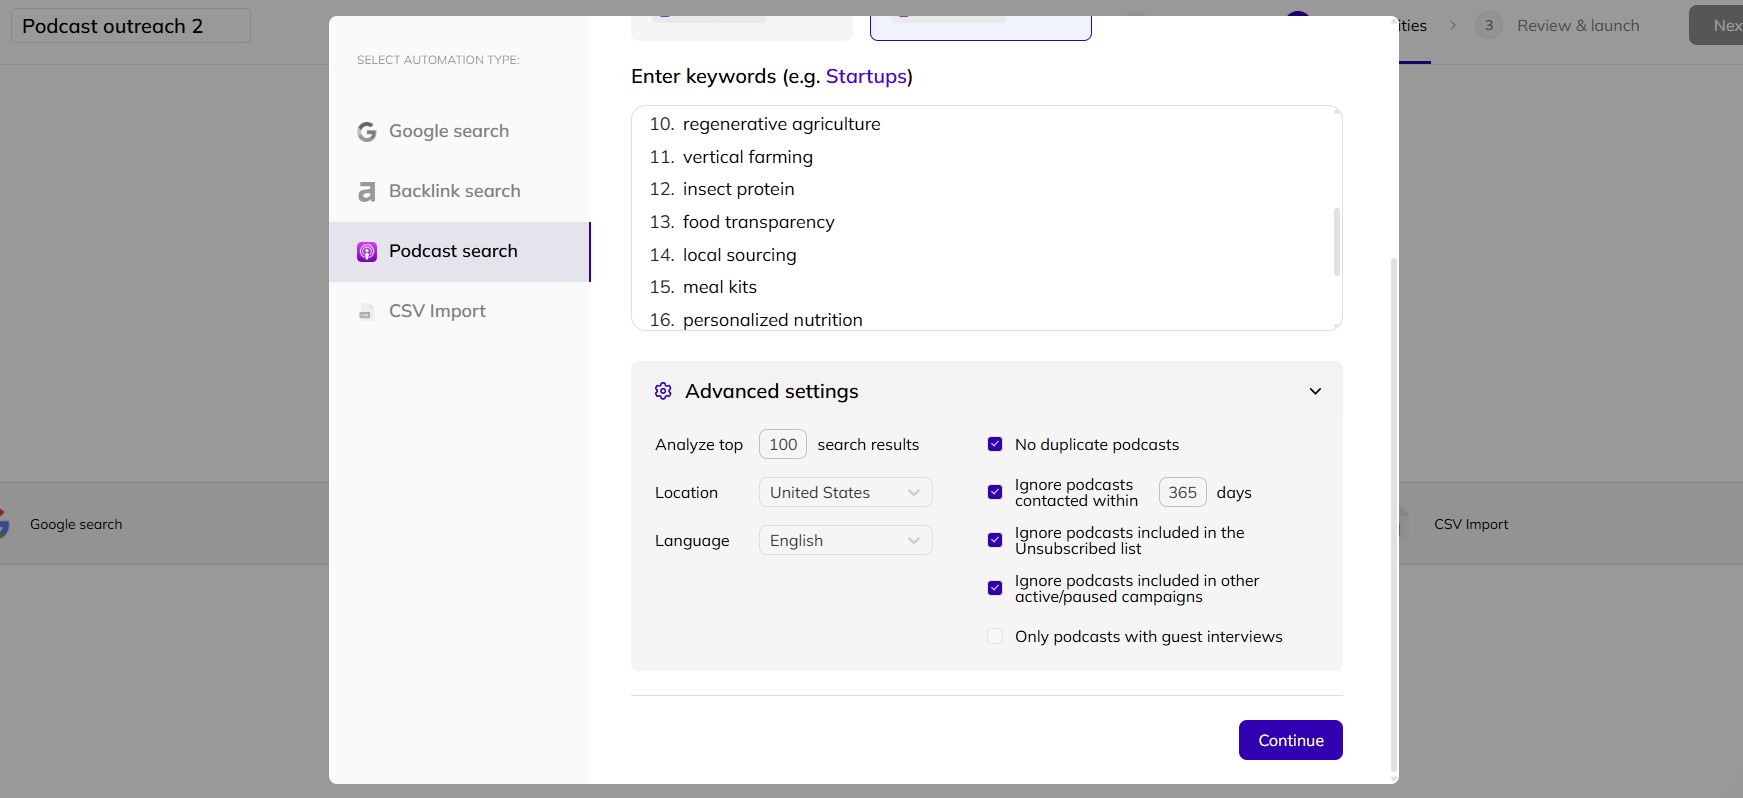
Click ‘Next step’ to proceed to the ‘Opportunities’ part of the campaign setup. The available automation types will be clickable in the left-hand menu. In this example, since it is related directly to podcasts, only Podcast search will be available to click and the rest will be grayed out.
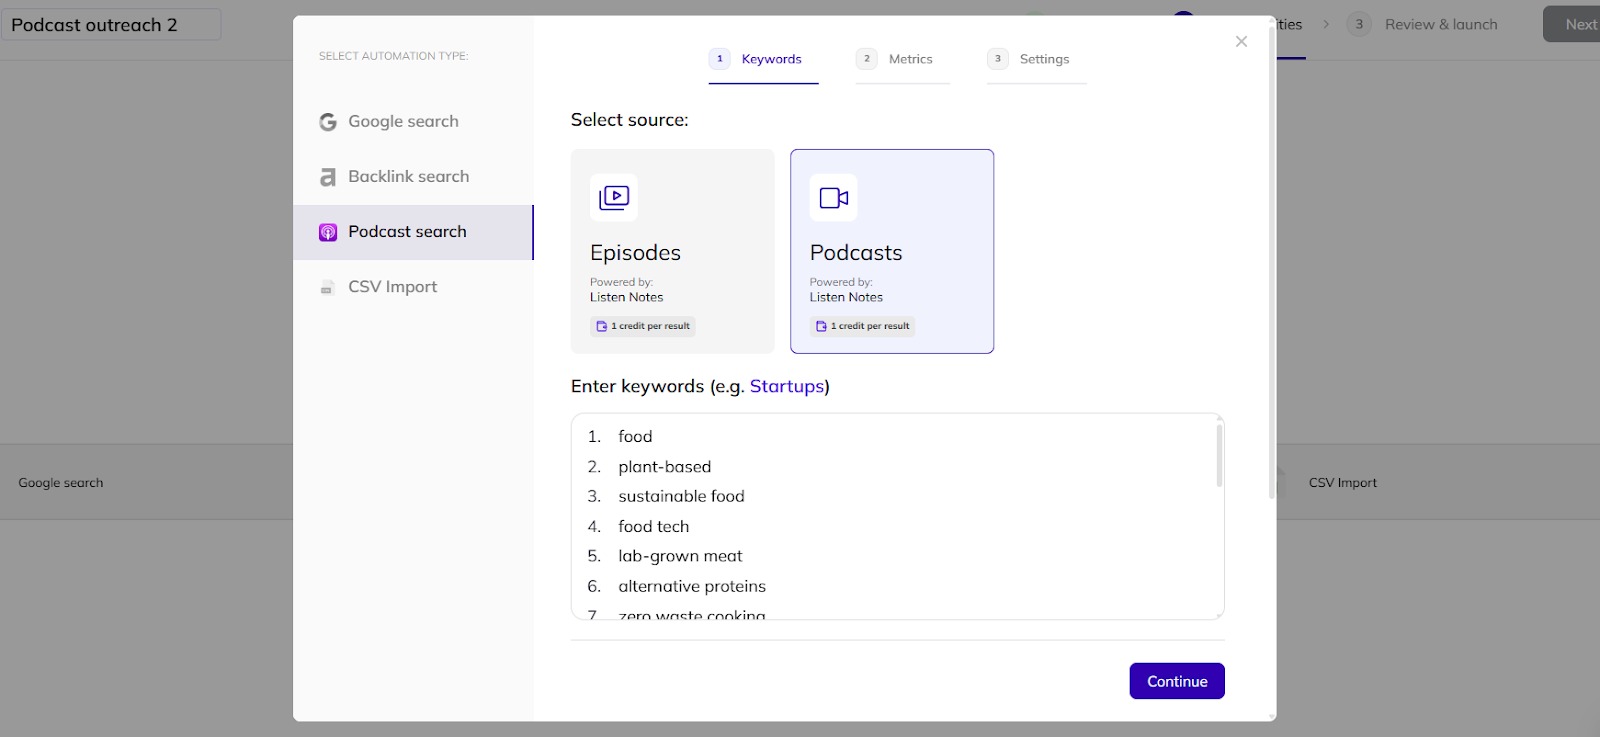
Select your source, edit your keywords and scroll down to the advanced settings to tweak as you wish before clicking ‘Continue’ to define your metrics.
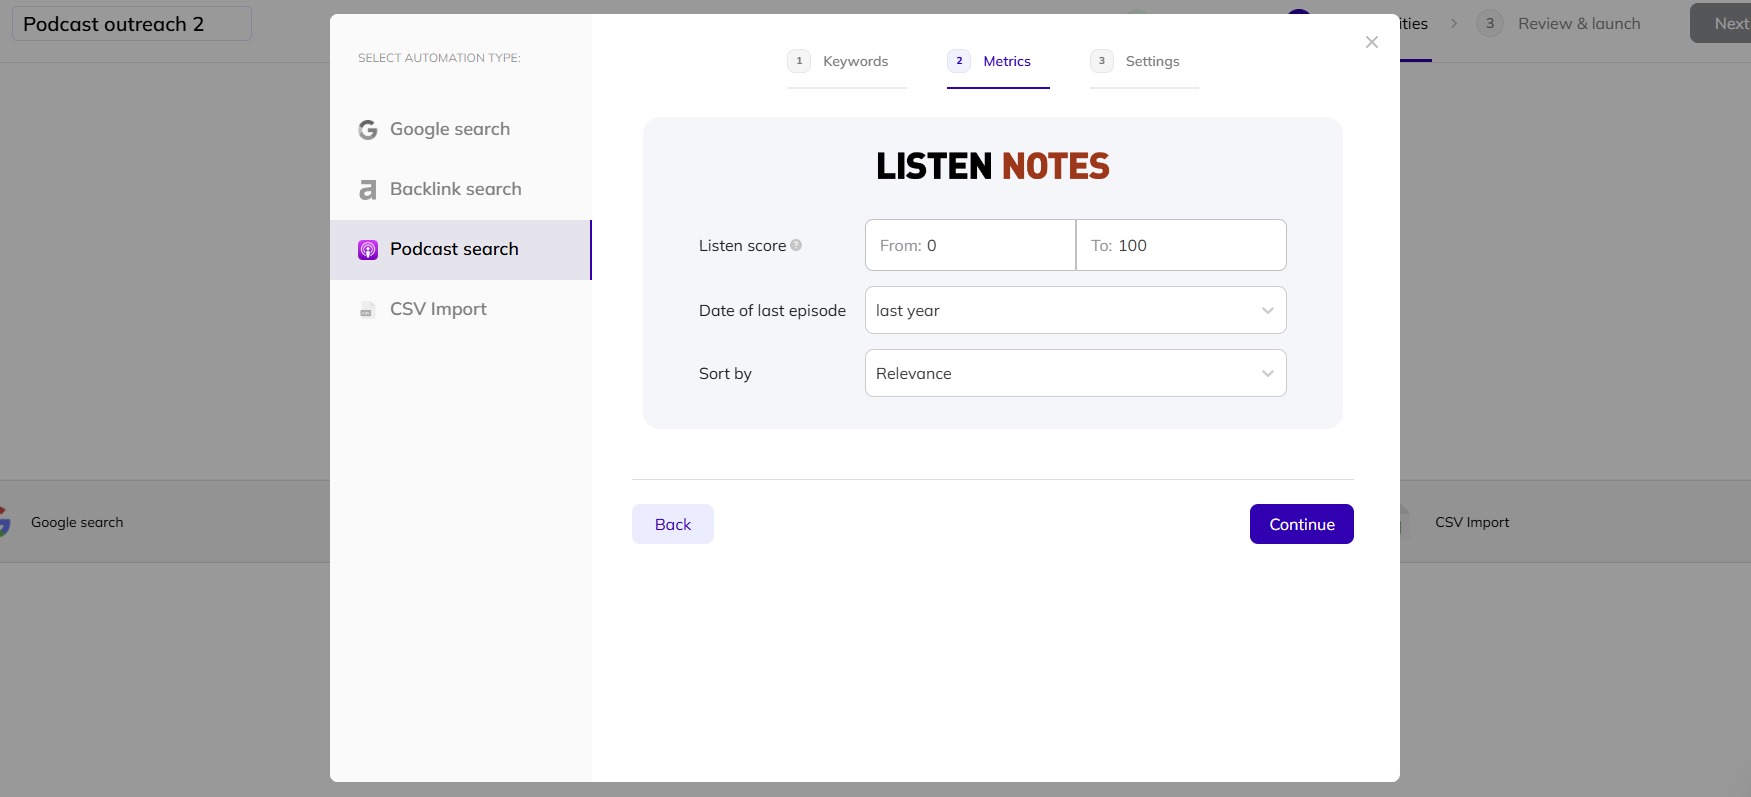
The Podcast search feature is powered by Listen Notes, which you can configure here to help identify the right opportunities.
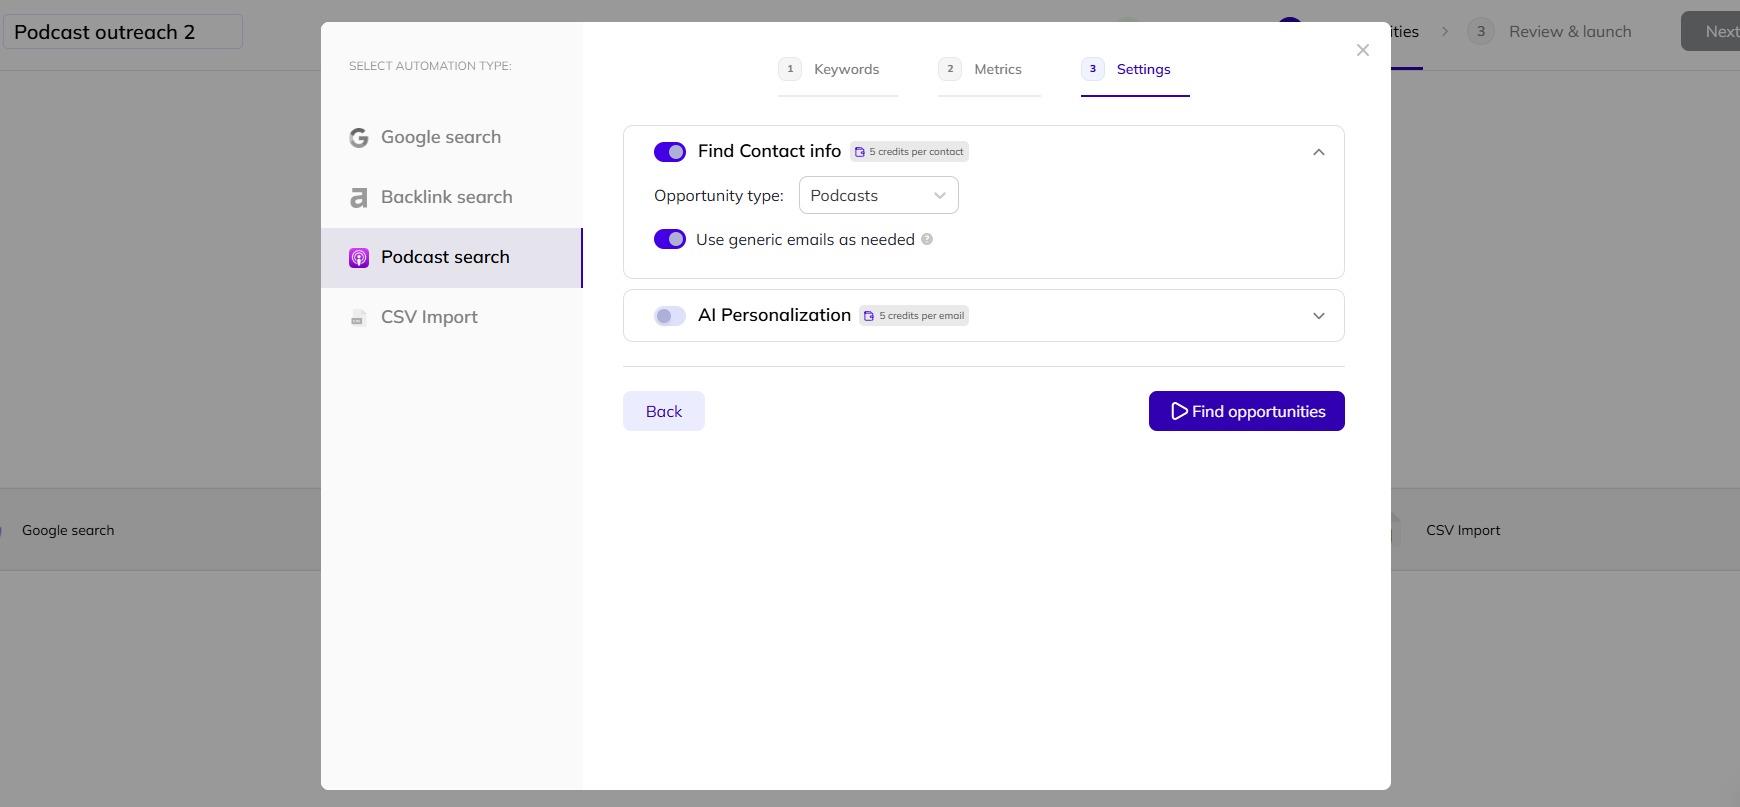
Finally, set your preferences for finding contacts and take note of the credit usage involved here. If you want to use AI to personalize your outreach, you need to add at least one AI variable to the sequence.
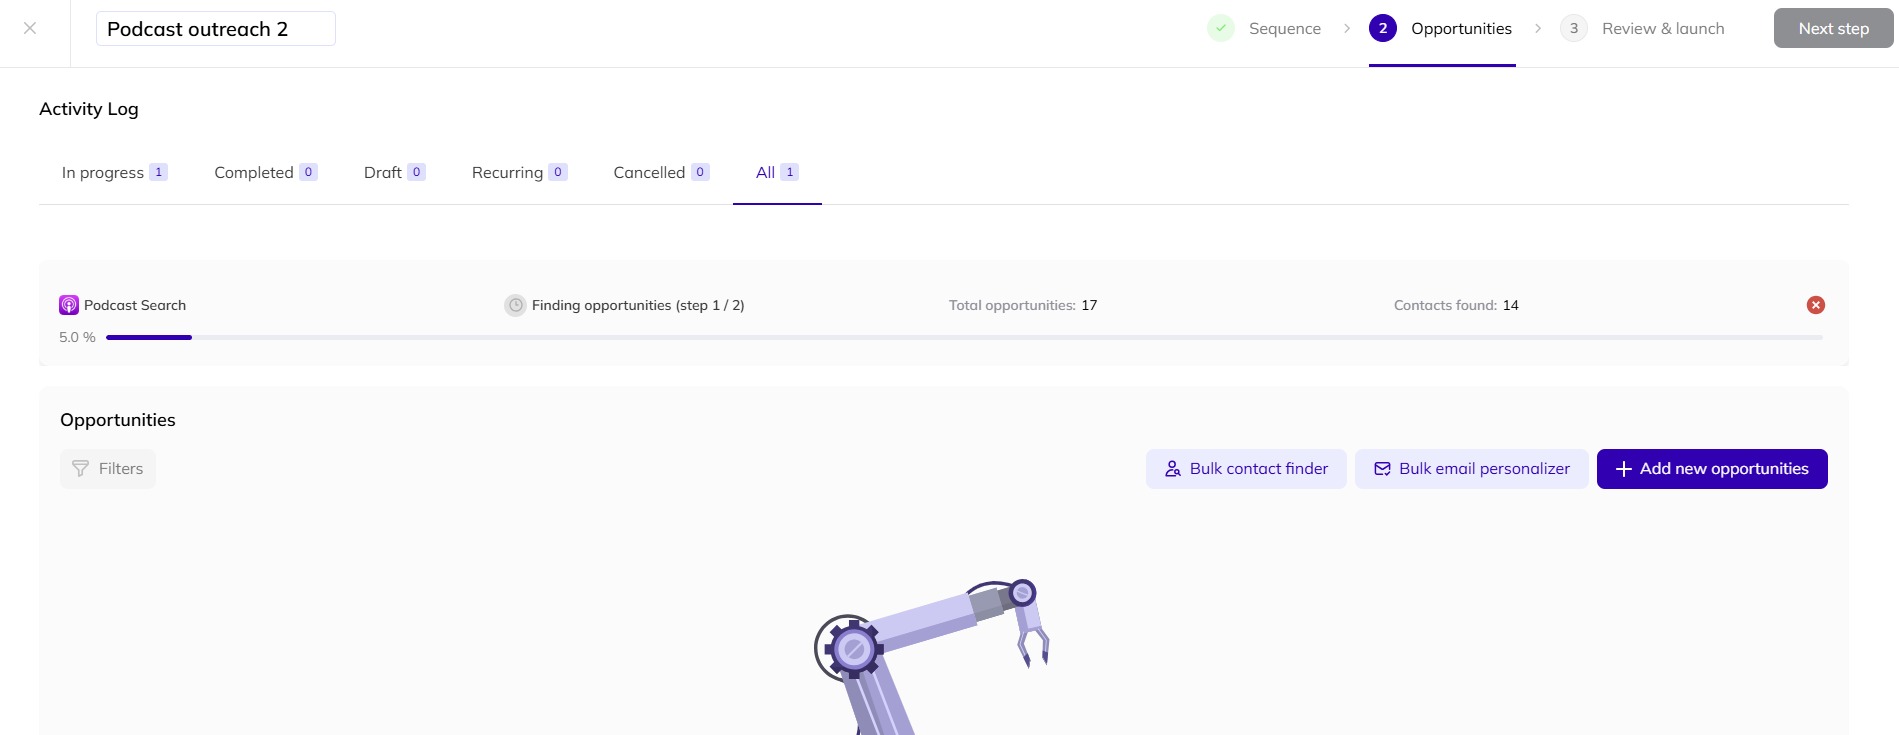
Click ‘Find opportunities’ to start the process for this particular campaign—you’ll get a progress bar with running totals of the opportunities the app identifies along the way. This will take a few moments depending on the criteria you have specified in the setup—a longer list of keywords, for instance, will have the app searching in real time for longer. You can cancel the search at any point using the red ‘x’ at the right-hand side of your screen.
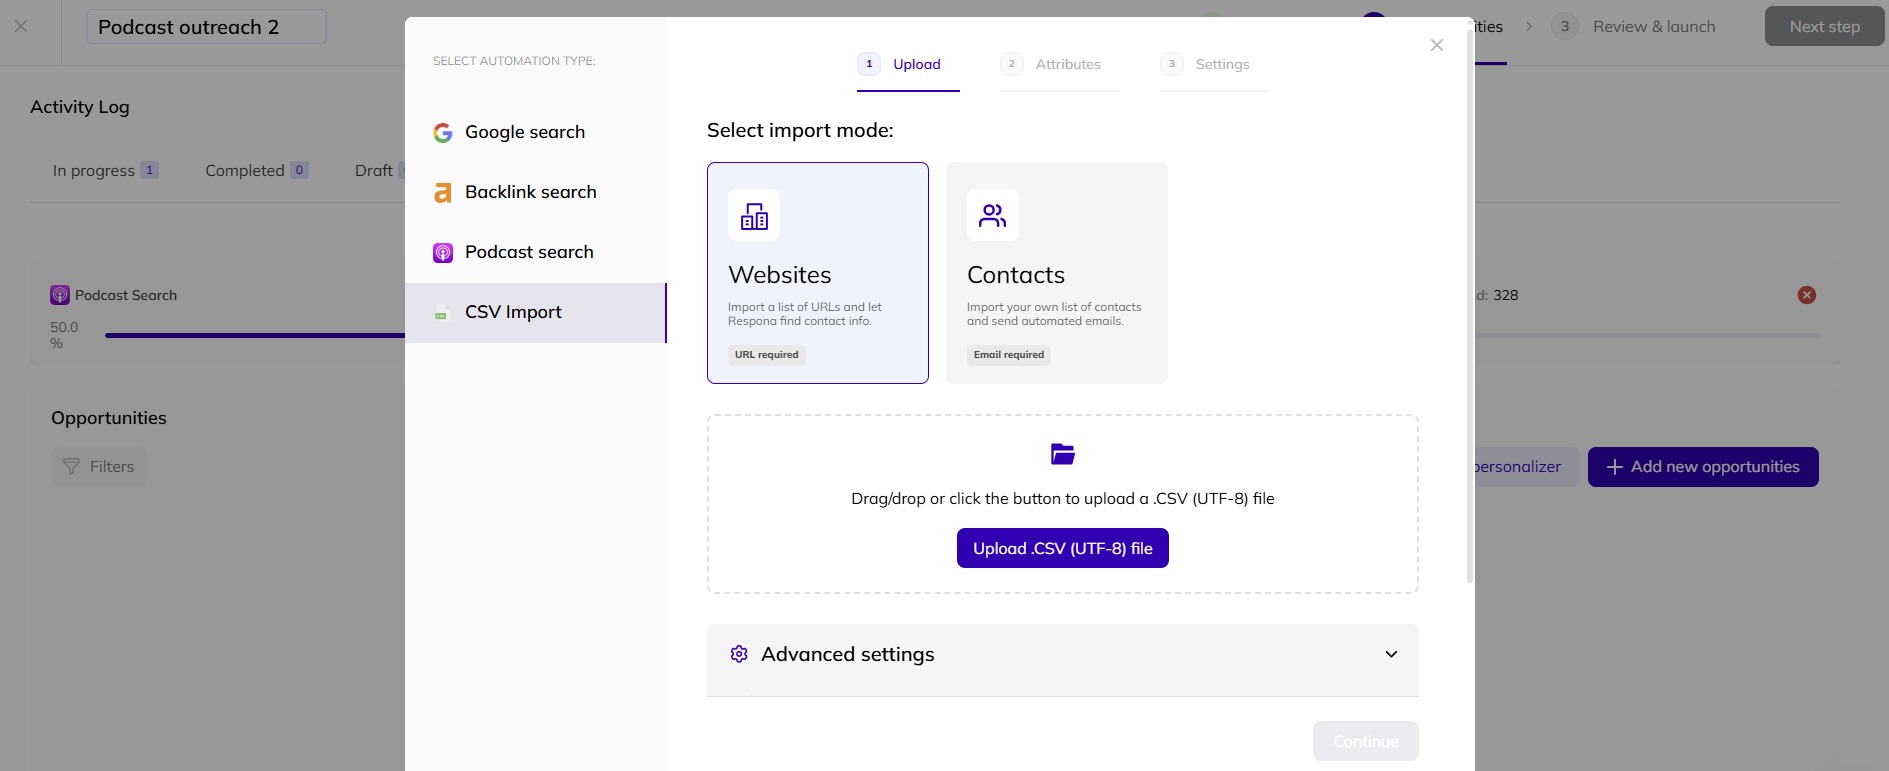
You can add your own new opportunities by clicking the purple button at the right-hand side of your screen. Here, you can upload a .CSV file of website URLs or email addresses by making a selection and dragging and dropping or clicking the ‘Upload’ button.
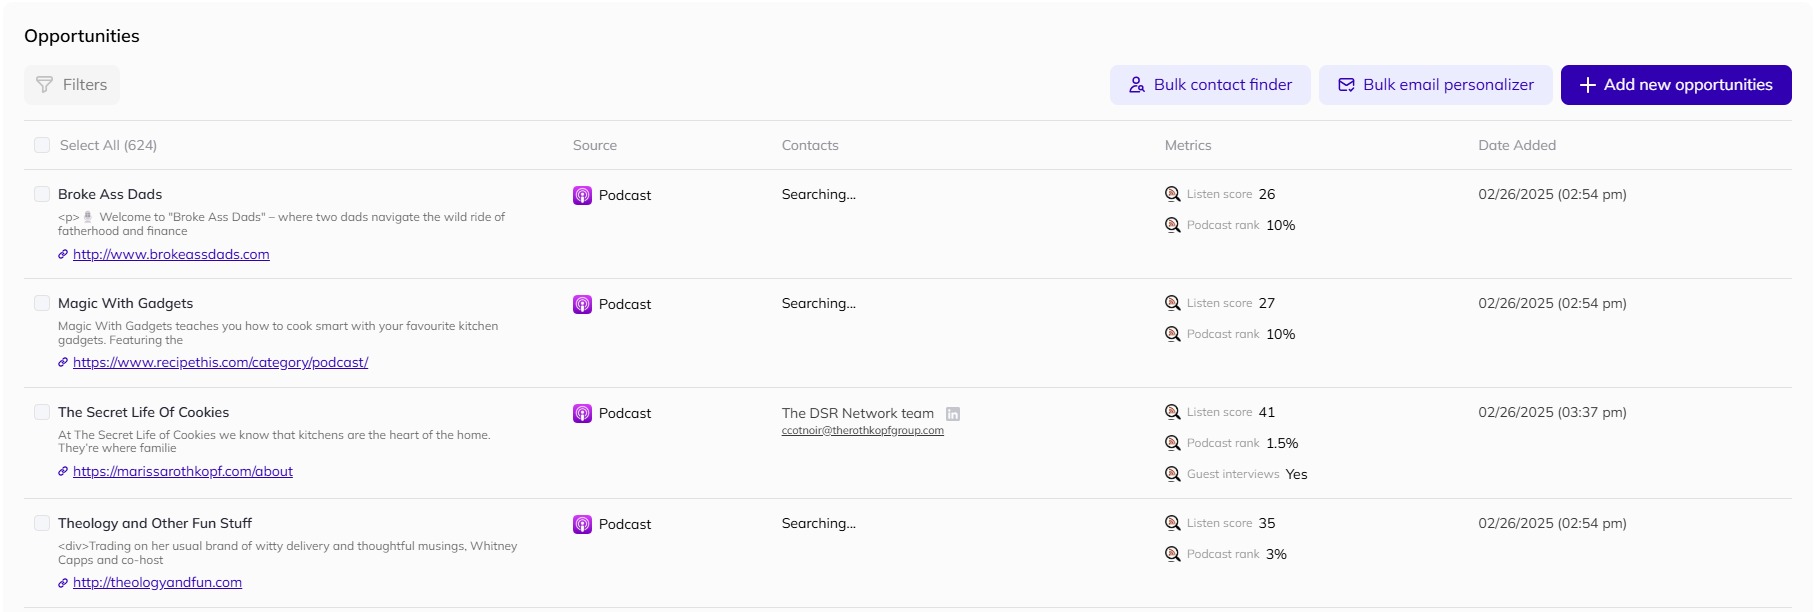
Your opportunities, whether found by the app or added manually, will appear as a list below the status bar and will be bound by the limits within your subscription.
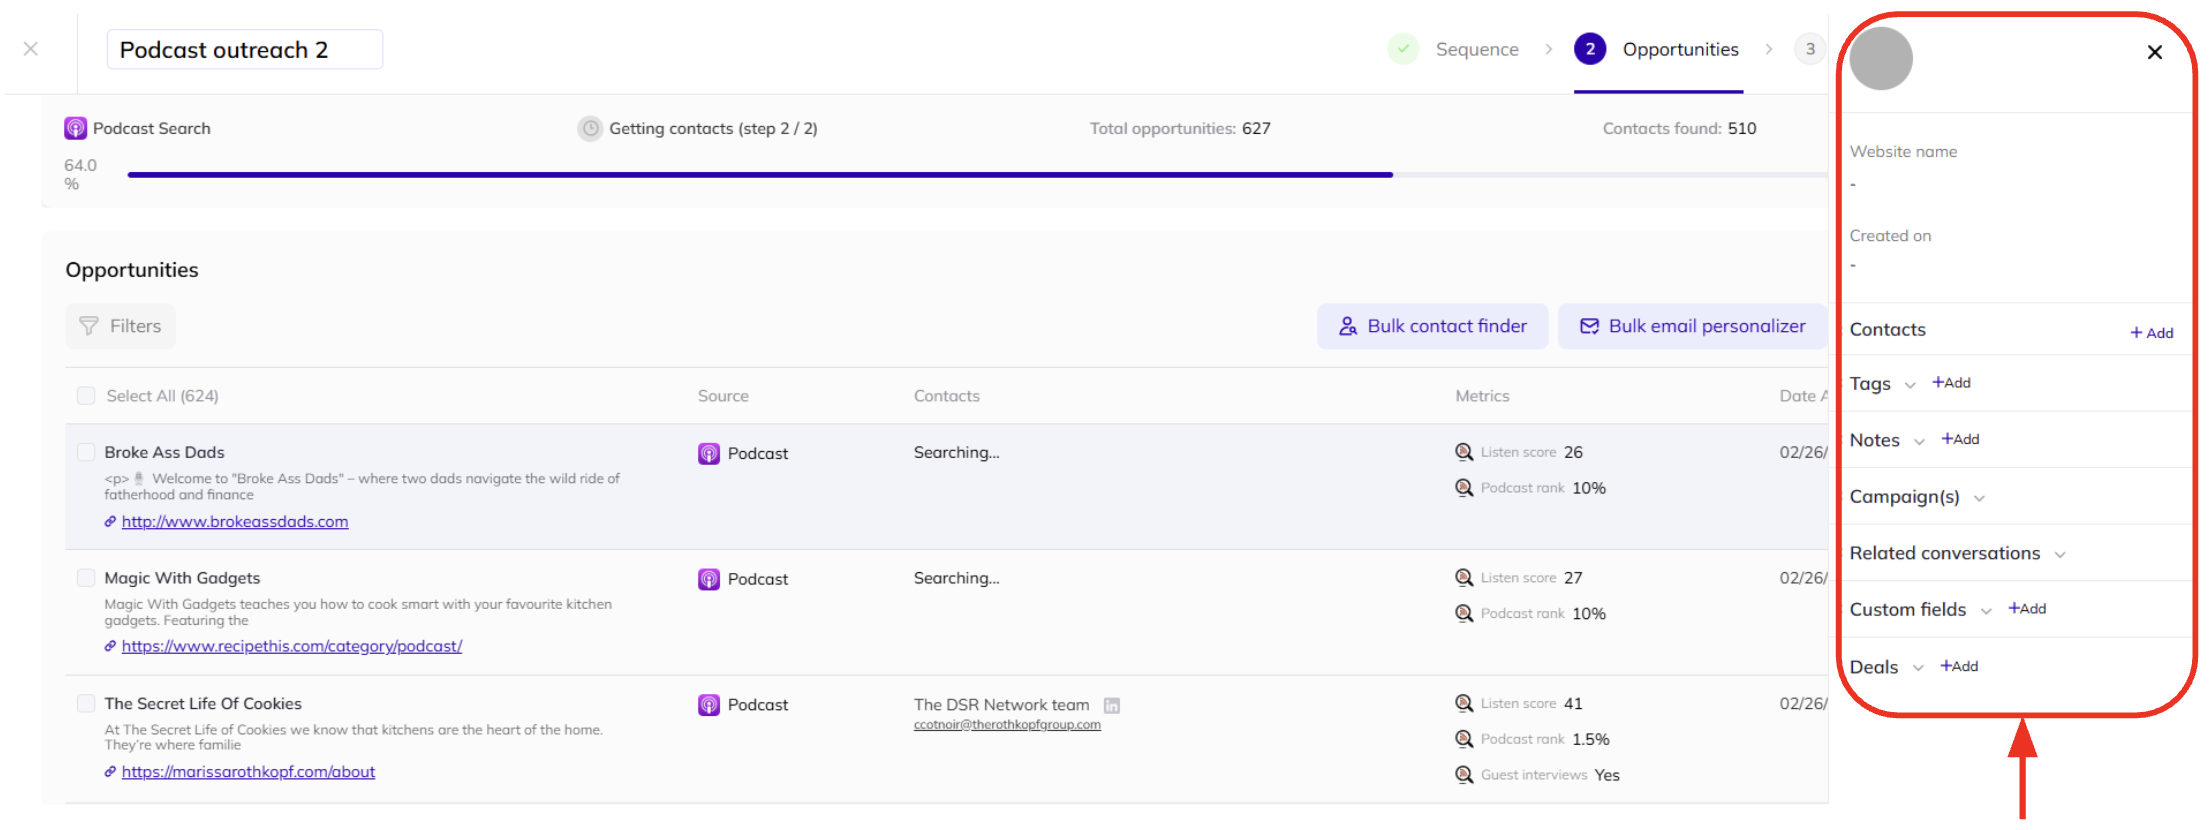
Click on any of the opportunities to bring up the settings sidebar on the right-hand side of your screen—here, you’ll be able to add things like tags, notes and deals to help you categorize and prioritize your leads. You can also remove the selected recipient and add a new one to keep full control over who receives each outreach message.
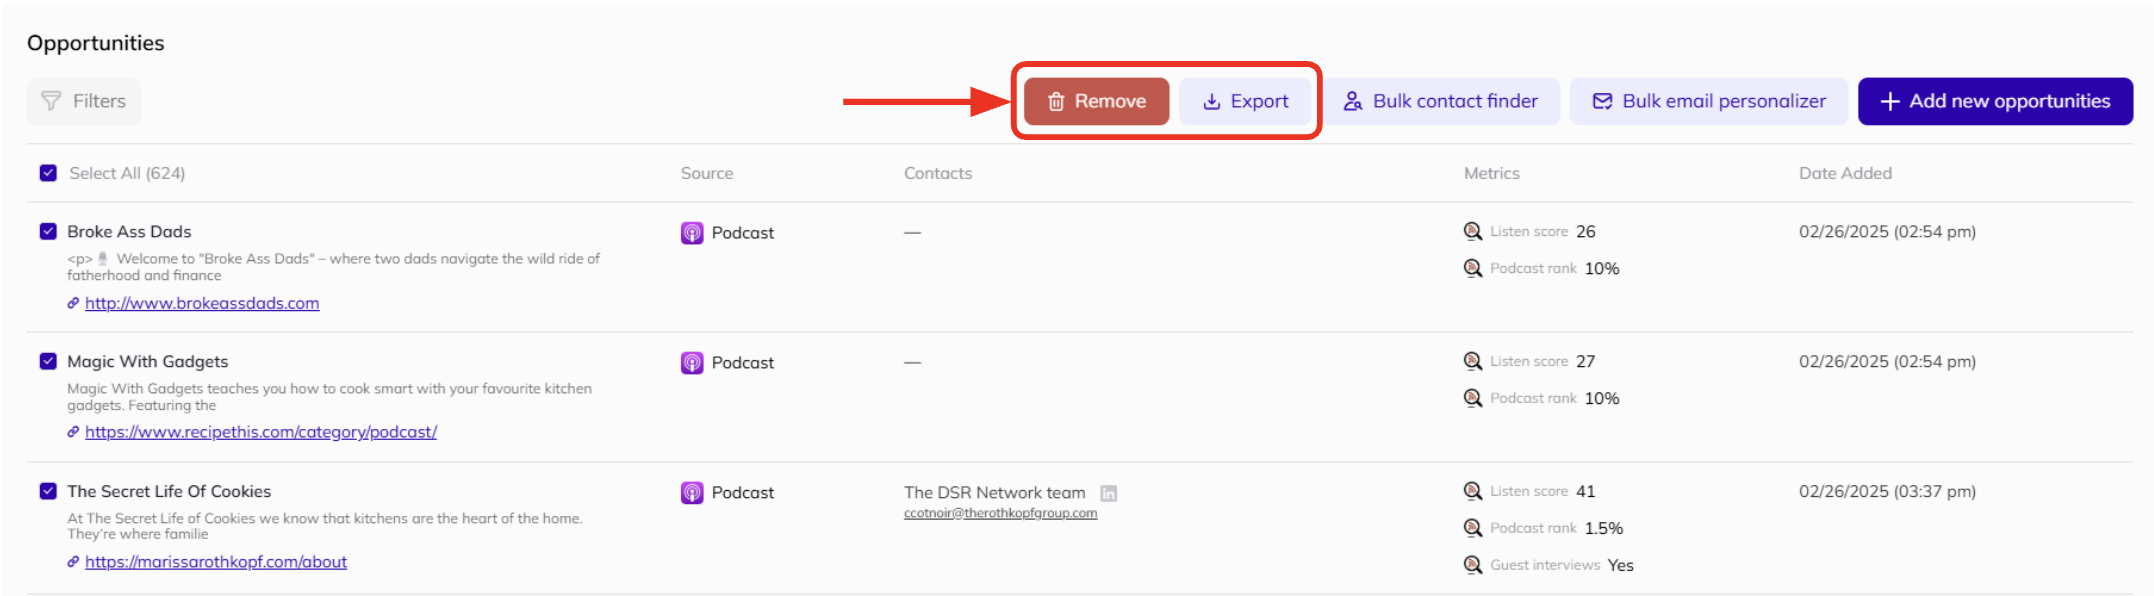
To remove or export any of your opportunities, select them using the check box to the left of the name to reveal the buttons.
You can find a summary of any search in the ‘Activity Log’ at the top of your screen—simply click the box or the arrow to reveal the results.

At the ‘Review & launch’ stage, you can check over each individual lead and edit your emails and the sequence in which they’ll be sent before going live with your campaign. Each column in the app screen is scrollable, so you can select a lead and then scroll down the middle column to reveal the email sequence and the right-hand column to add custom details.
Click ‘Launch’ at the top-right of your screen when you’re ready to go live. This will present a pop-up box for you to change your campaign settings, such as the schedule, the sender email(s), the priorities and the email verification preferences.
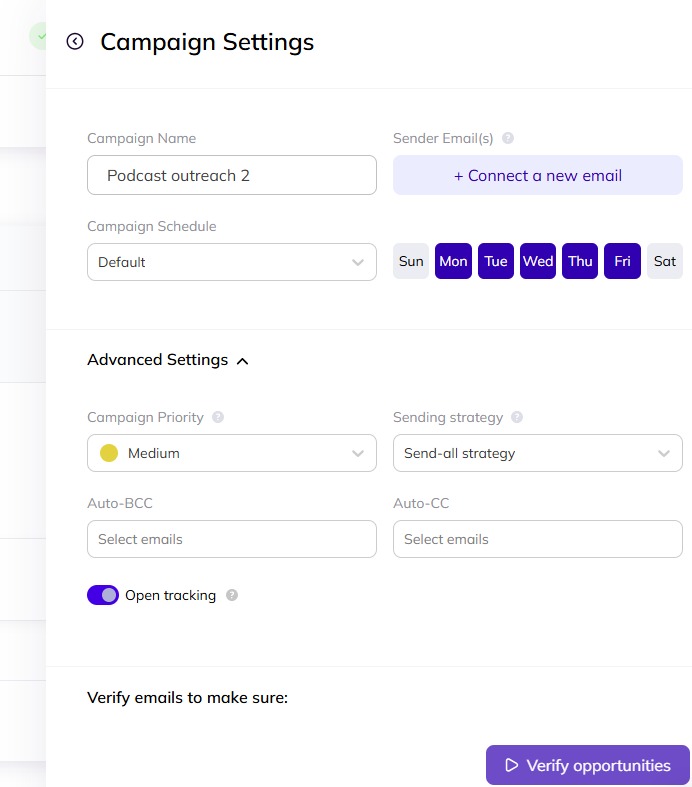
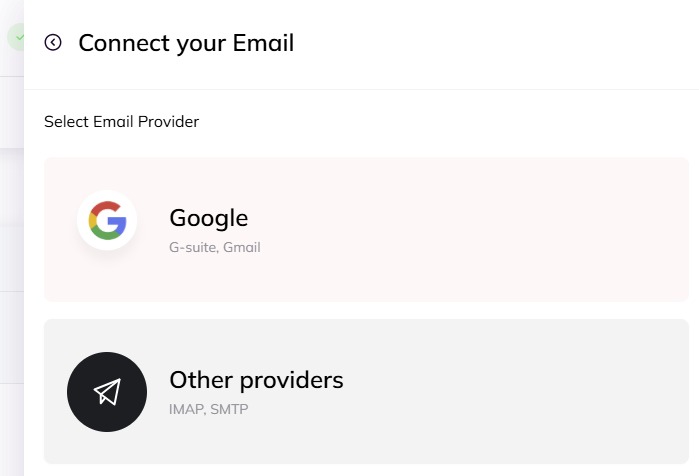
You must set your sender email(s) and schedule before clicking ‘Verify opportunities’ here. AI Backlink Builder developer, Respona, is a verified Google partner, so you can choose to connect Gmail and Google Workspace accounts via a one-click OAuth connection. For other email providers, the app uses standard IMAP/SMTP credentials to link your inbox.
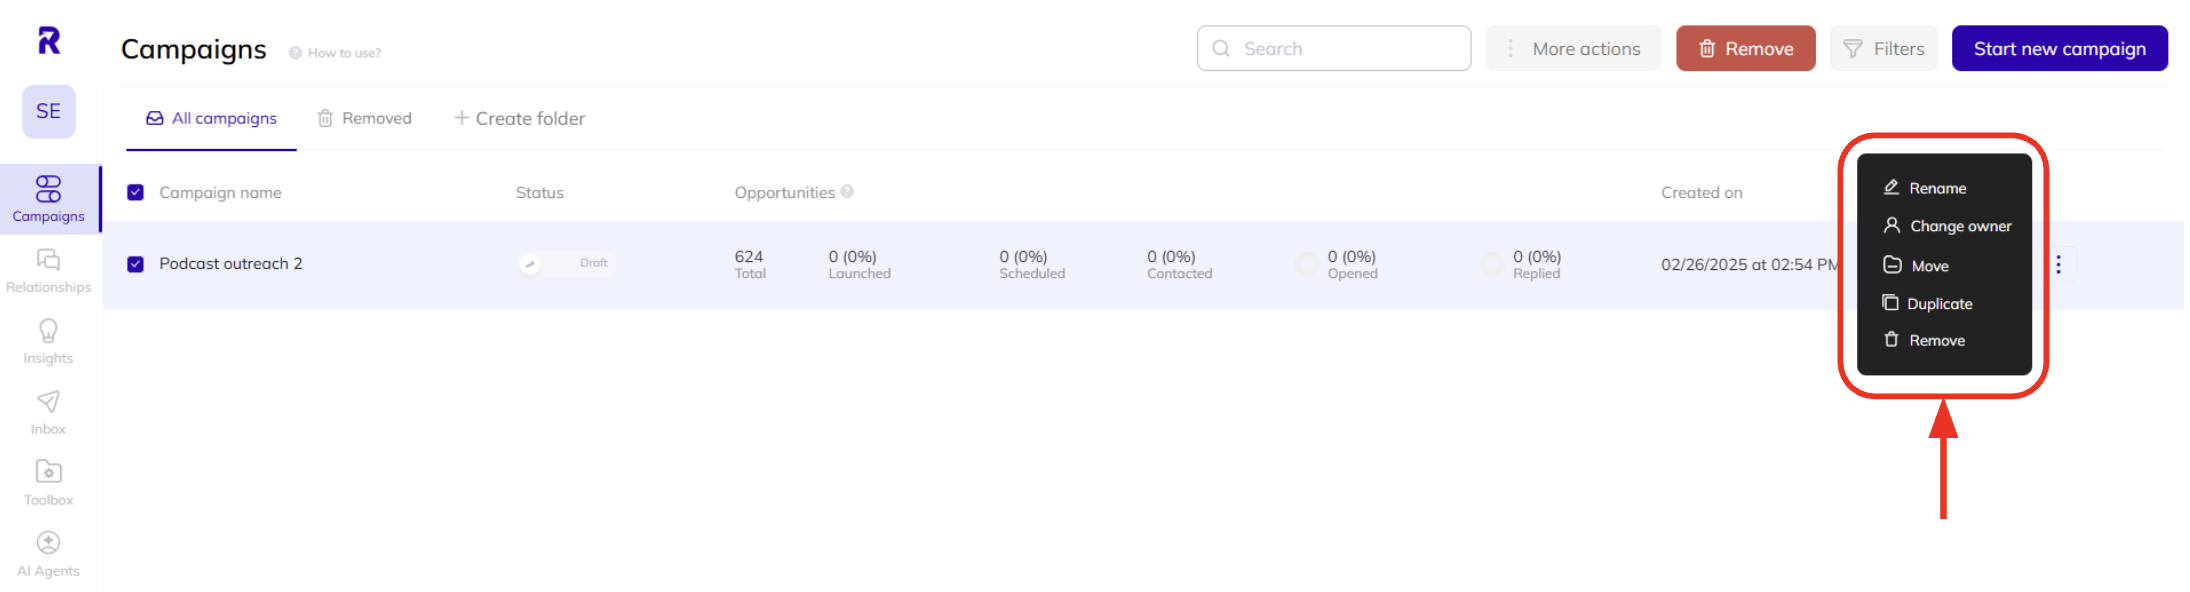
Any campaign you save in either draft or launched form will appear in the ‘Campaigns’ section at the top of the left-hand menu. You can remove a campaign, move it or change its owner by clicking the check box to reveal the additional options.
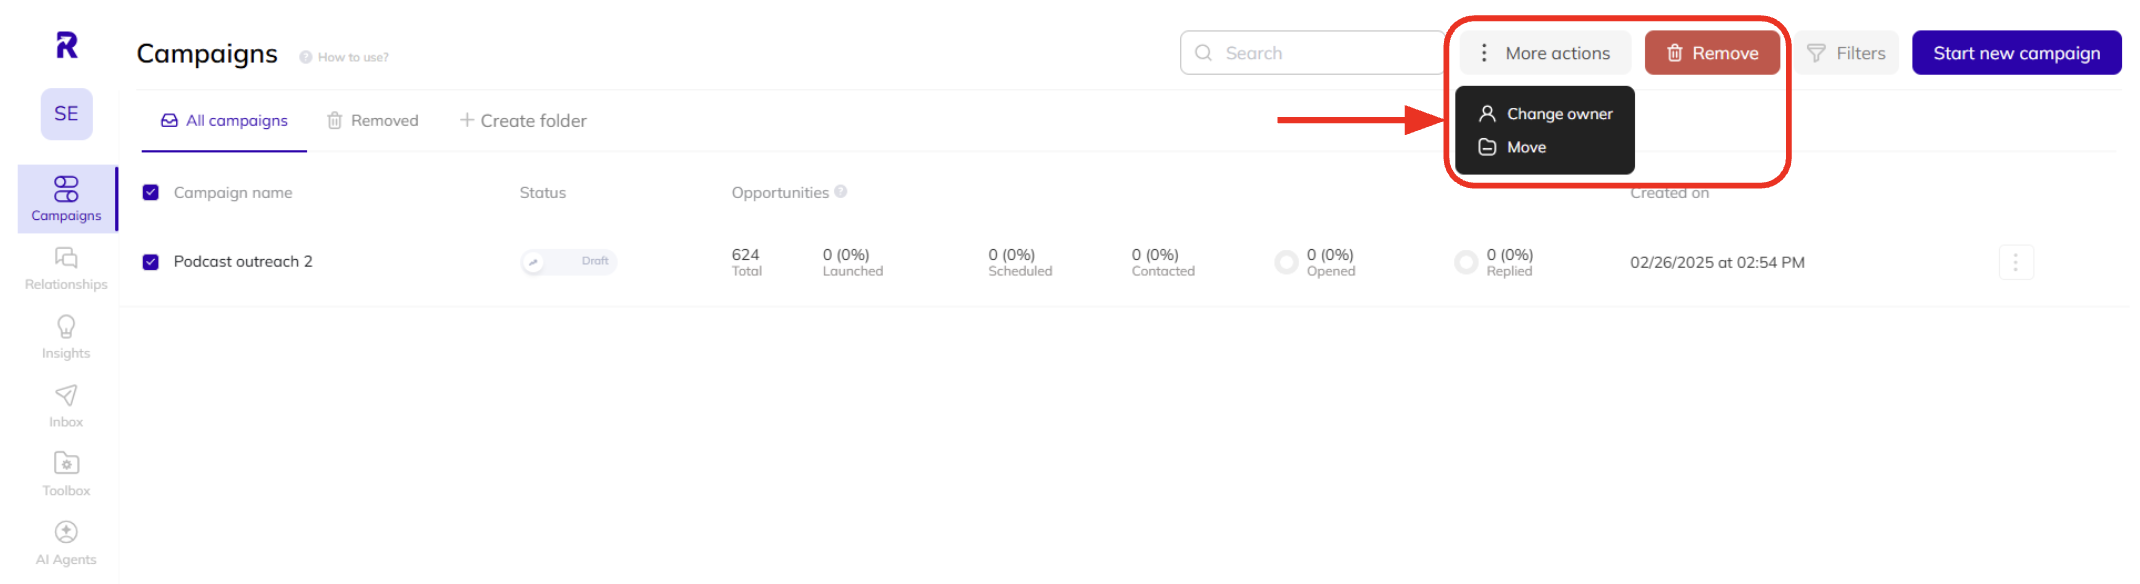
You can also use the three dots to rename or duplicate a campaign.
If you delete an entire campaign, you can restore it from the ‘Removed’ section of the campaigns list. If you delete individual opportunities within a campaign, they cannot be restored. However, you can still access your search history in the activity log under the ‘Opportunities’ step outlined above and rerun the search to find those opportunities again.
Relationships
The websites and contacts you find in any of your searches during the setup of a campaign will appear in the ‘Relationships’ section. These lists count toward your contact usage, whether discovered through the app’s built-in search or imported manually. If you reach your plan’s contact limit, you can clear space by removing unwanted contacts from the ‘Relationships’ tab, which will help free up room for new leads. To do this, tick the necessary boxes and click the red ‘Remove’ button.
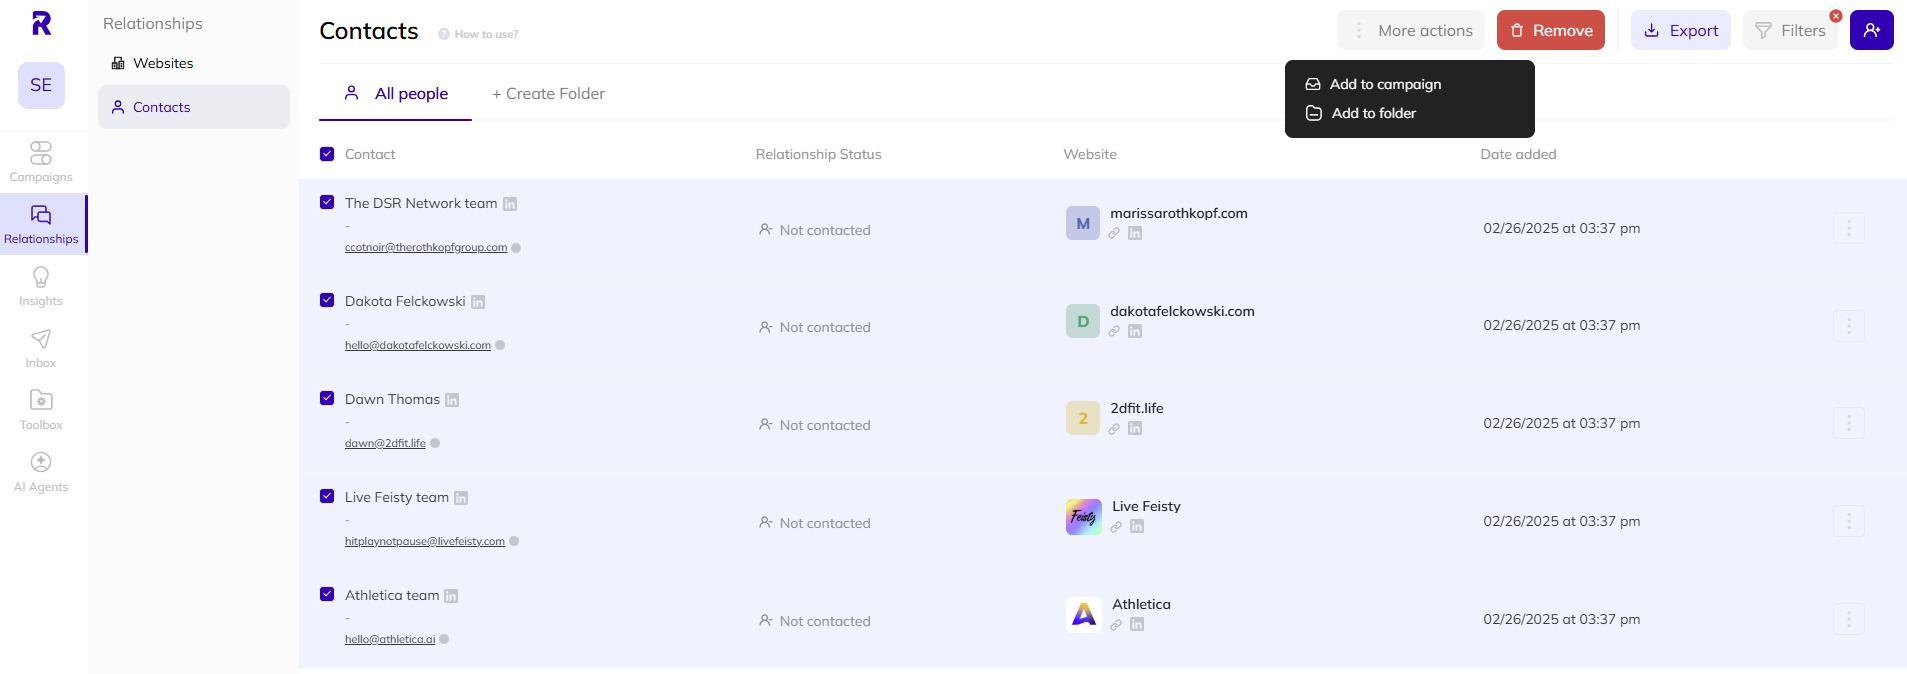
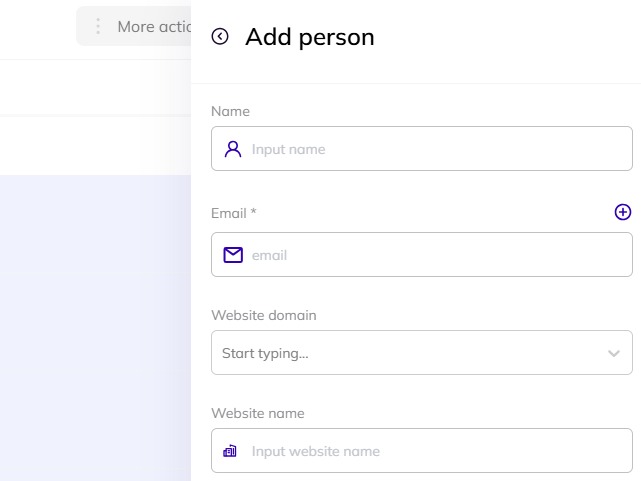
You can also export all your relationships via the blue ‘Export’ button or add new ones by clicking the purple ‘+’ button at the top-right of your screen.
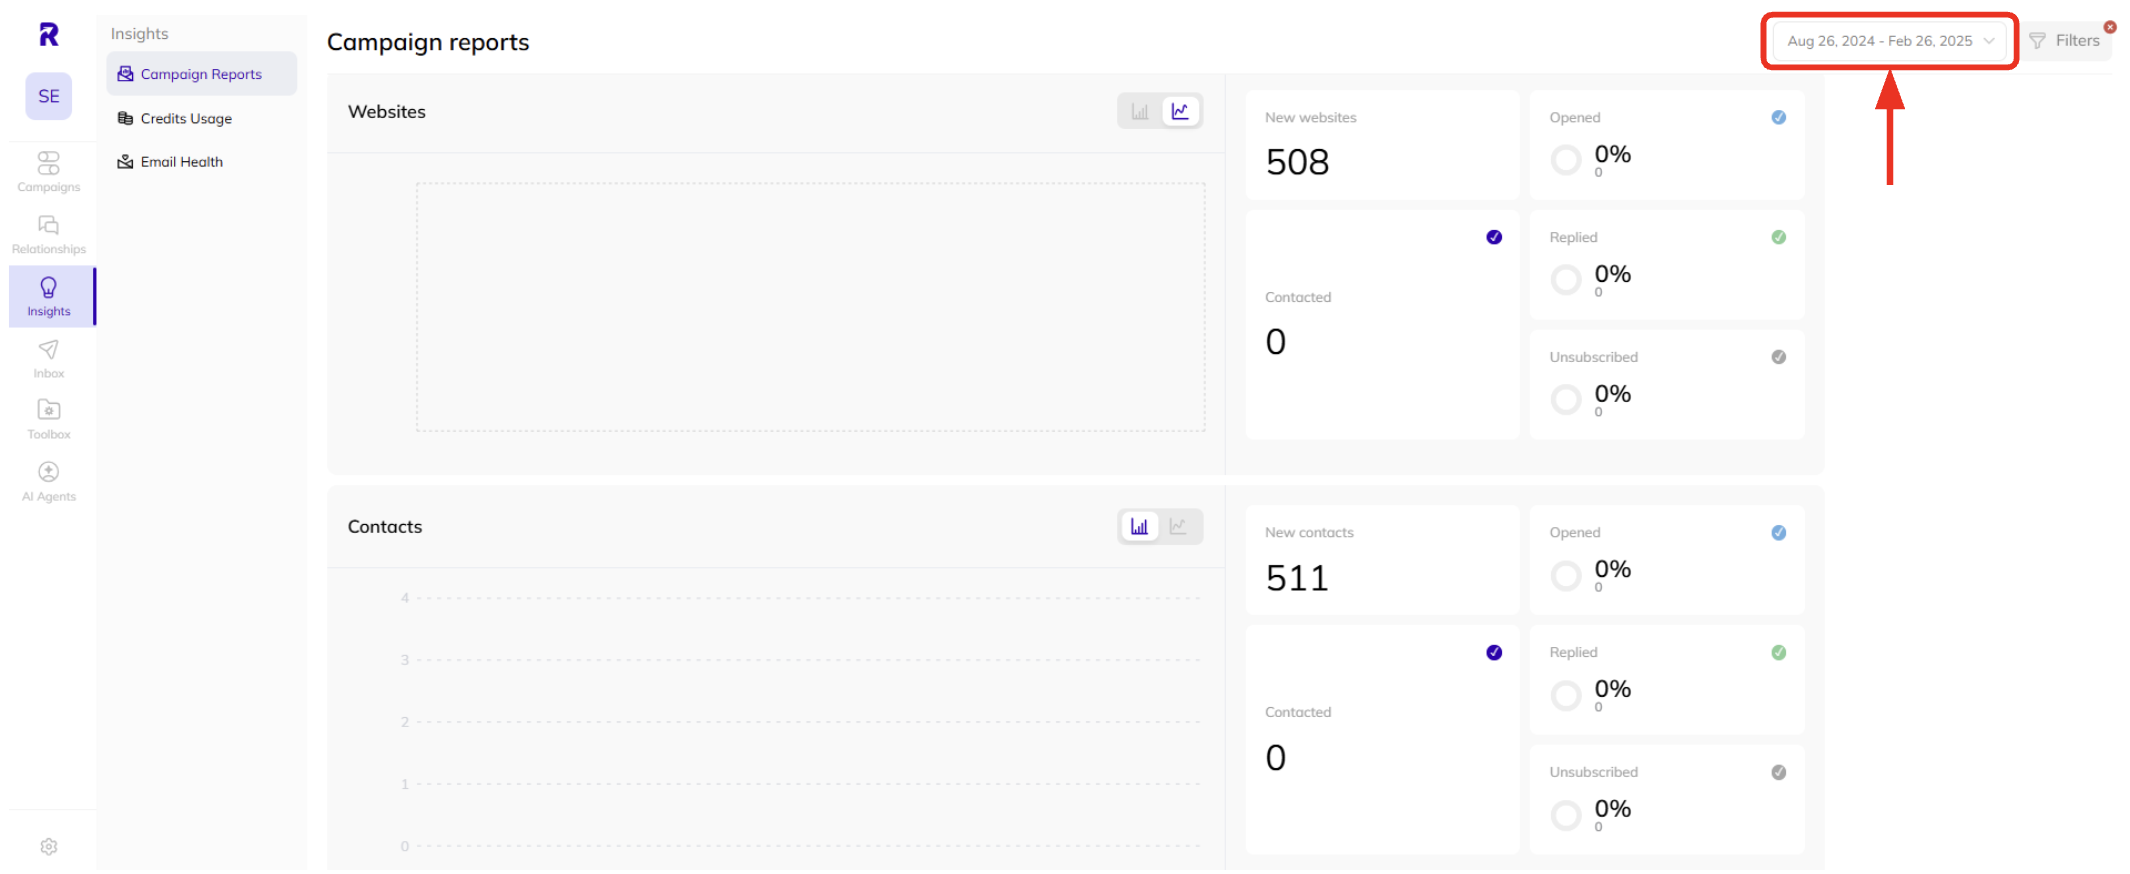
Insights
In the ‘Insights’ section, you’ll find ‘Campaign Reports’ along with a breakdown of your ‘Credits Usage’ and ‘Email Health.’
The reports will show you email performance, including a tip for the best time to email, plus insights into your websites and contacts from your ‘Relationships’ lists. You can change the timeframe for these reports using the option at the top-right of your screen.
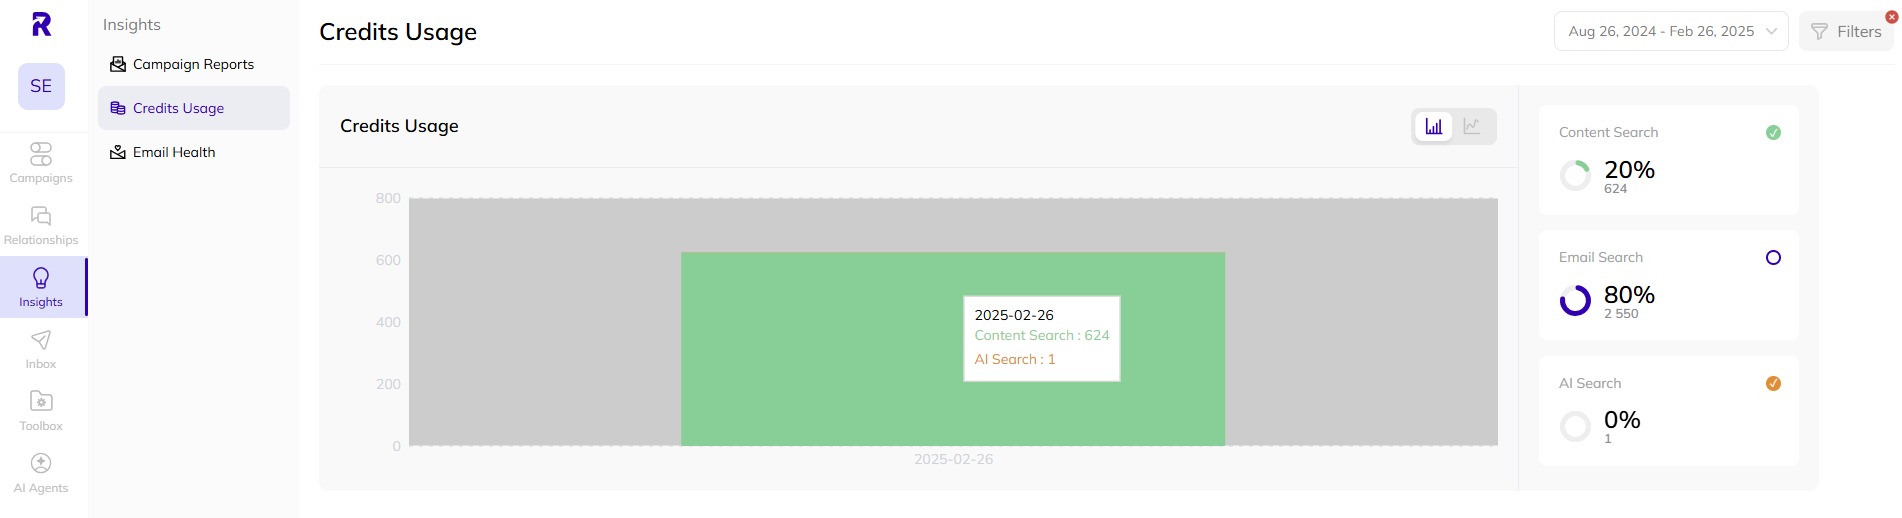
In the ‘Credits Usage’ tab, you’ll see a breakdown of how your credits have been utilized throughout the present billing cycle, including content searches, email searches and AI searches. Hover over the graph to reveal the total numbers.
The ‘Email Health’ tab gives you reports on the test emails it periodically sends out to check for issues in your contacts list. If no health report has been generated for a new campaign email, you can check back in a few hours to try again.
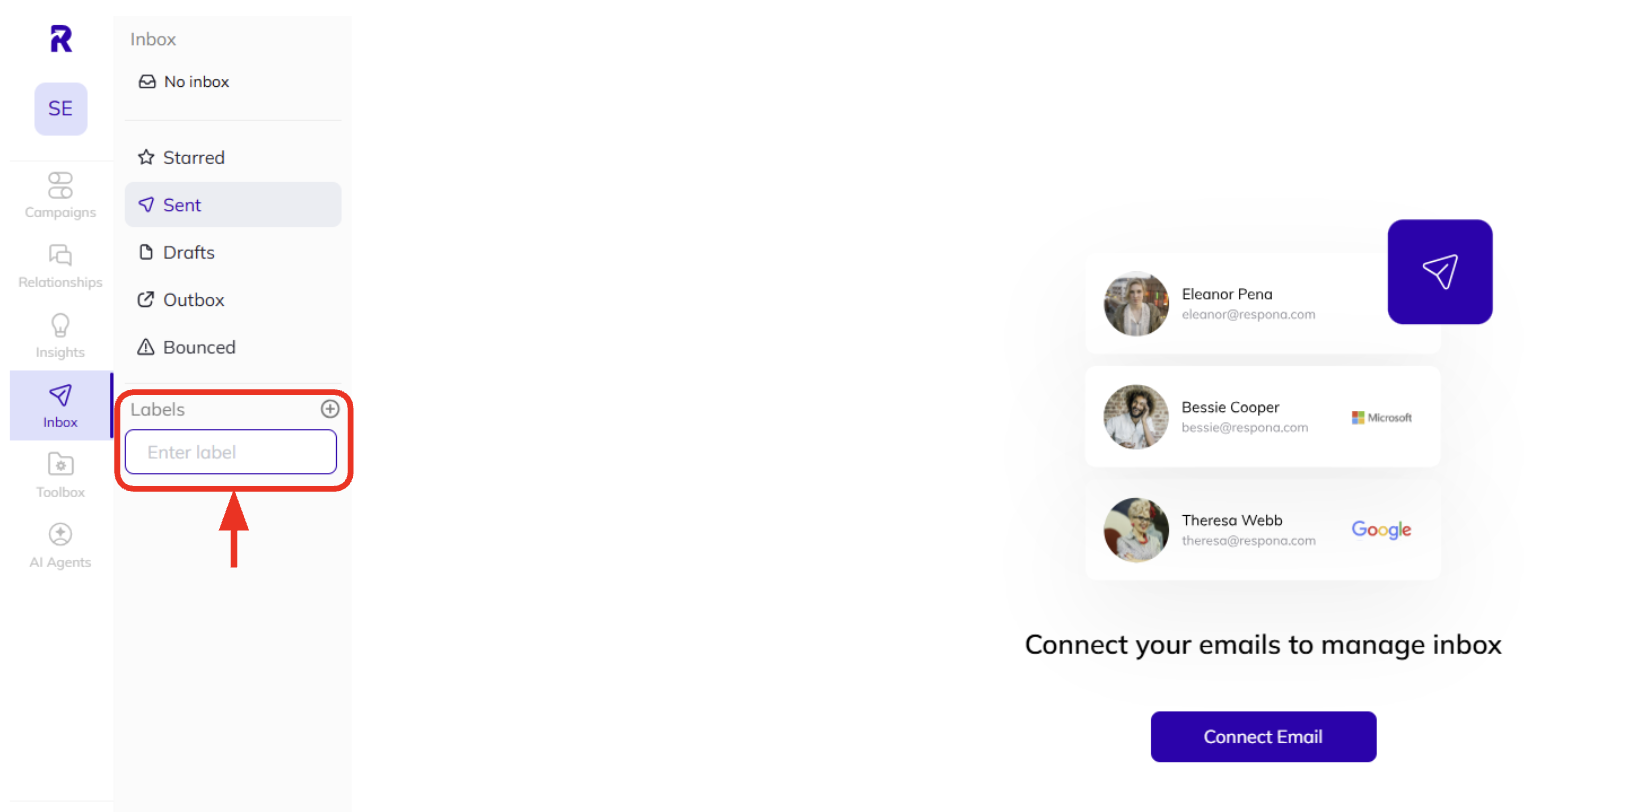
Inbox
Your ‘Inbox’ is where you can manage your emails to and from each of your opportunities. You can ‘star’ the emails you want to go back to later, view your sent emails (including test emails) and also see which ones have bounced back from your contacts’ email addresses.
You can add labels, too, so you can organize your inbox for efficient outreach campaigns.
Toolbox
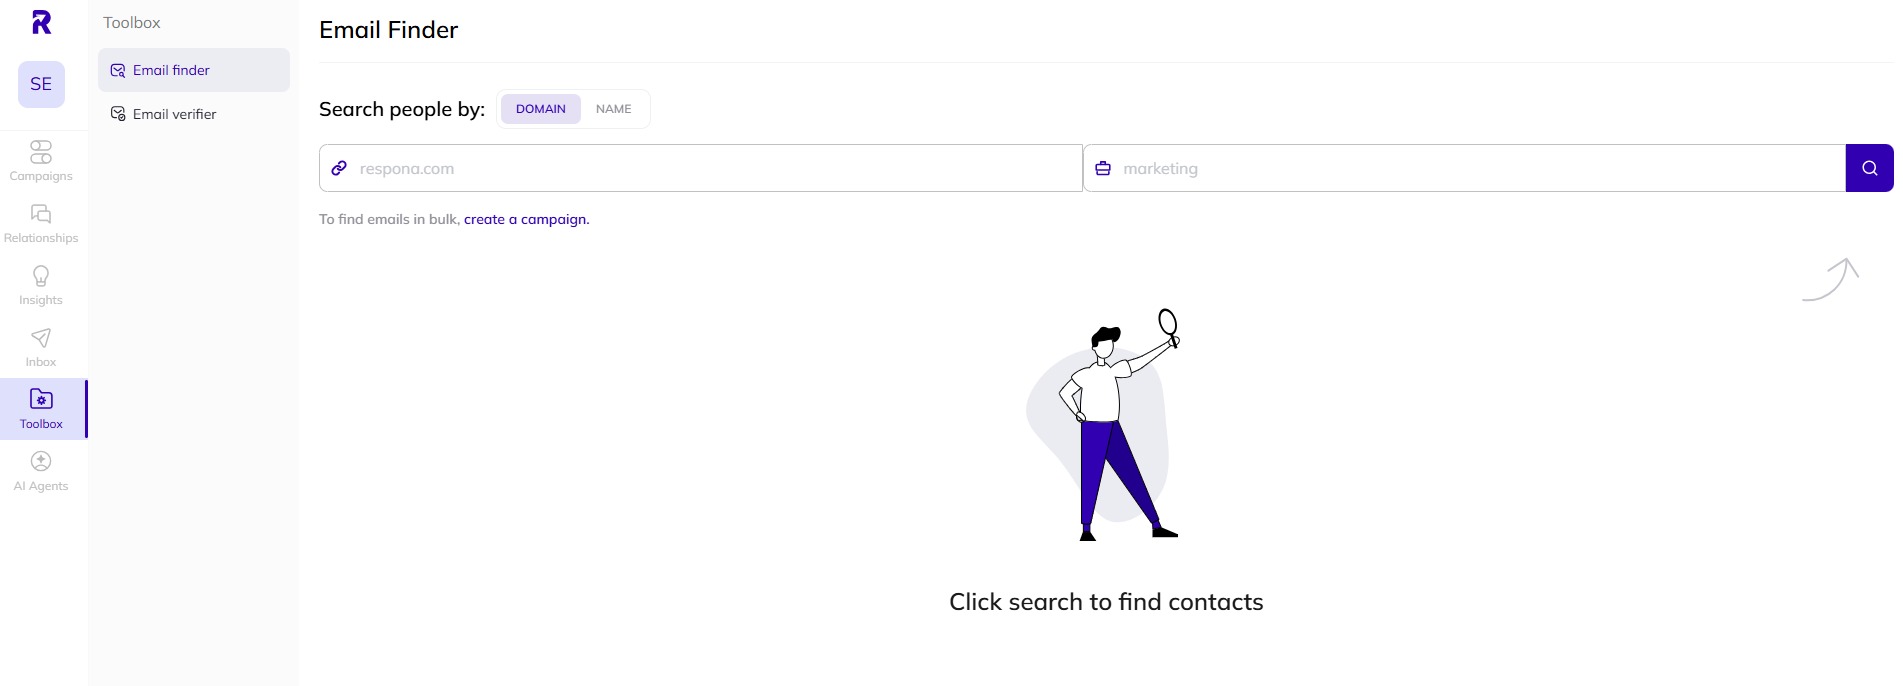
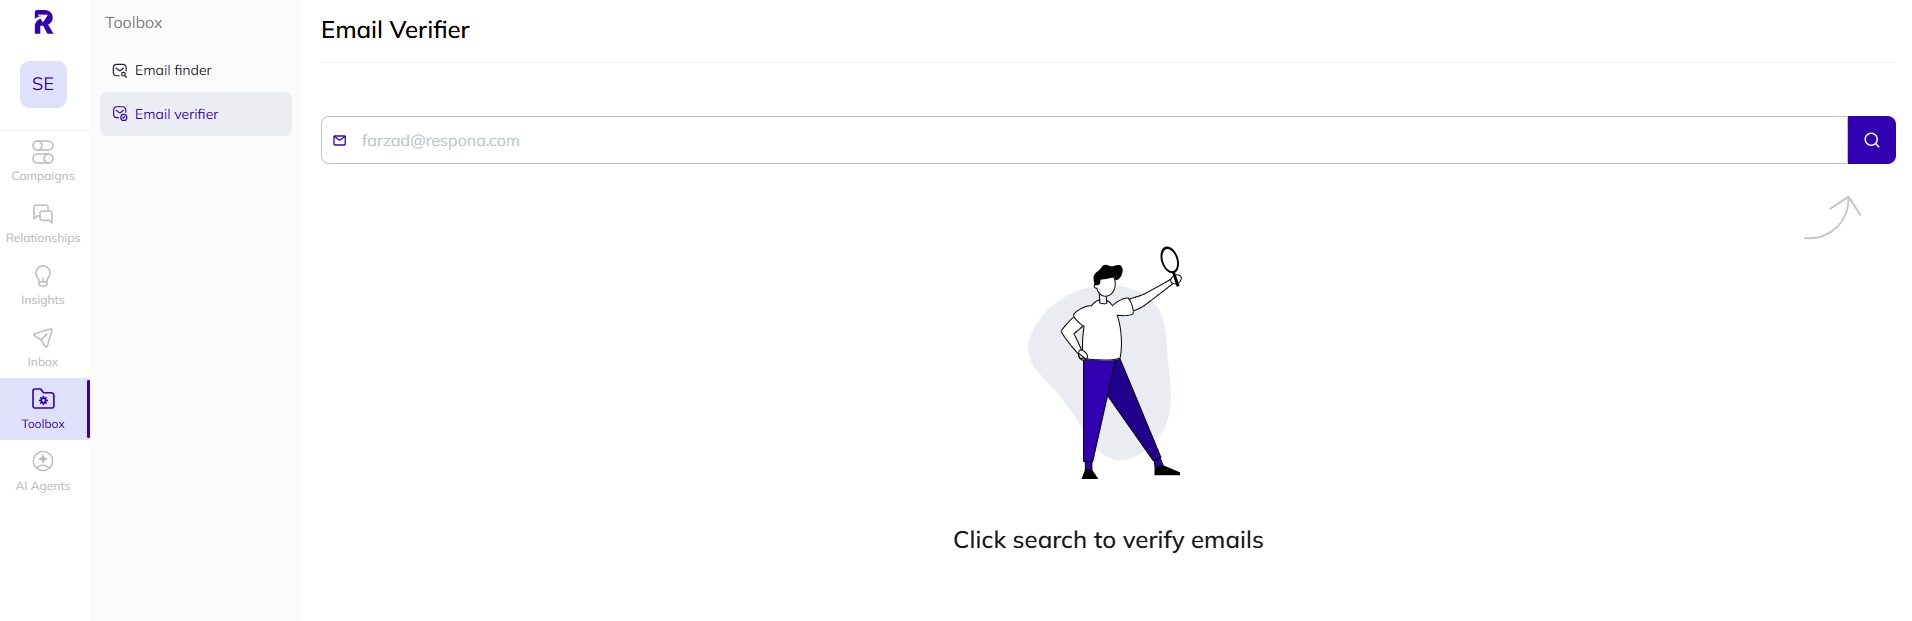
In your ‘Toolbox,’ you’ll find an Email Finder and an Email Verifier.
The Email Finder scours public sources like LinkedIn and websites to find prospects, while the Email Verifier confirms their validity in real time via SMTP checks, so you can rely on accurate, up-to-date contact information across your outreach activities. Enter your search criteria into the text boxes and click the magnifying glass icon to start the Email Finder search.
To verify an individual email address, simply enter it into the search bar in the Email Verifier and click the magnifying glass icon to start the process.
Settings and Billing
Head to the app settings page at any point via the cog icon at the bottom-left corner of your screen. Here, you’ll find tabs for:
- Billing: Find details about your subscription, connected email accounts, credits and contacts within each billing cycle. You can also make in-app purchases for extras here.
- Workspaces: Create Workspaces to separate and manage different brands, teams or projects under a single account. Each Workspace has its own campaigns and settings, while contacts in the Relationships tab remain unified across all Workspaces. This structure keeps workflows organized and ensures that each project or brand can maintain distinct outreach efforts, even as contacts are centrally available.
- Unsubscribed: Find the email recipients that have opted to unsubscribe from your emails.
- Email accounts: Manage the email accounts you’ve connected to AI Backlink Builder and get stats on the status and performance of each one.
- Schedules: Customize your email campaign schedule to suit your outreach needs.
- Templates: Manage your own outreach templates for use in campaigns.
- Integrations: Add integrations with tools like Semrush to boost the functionality of the app—the Semrush integration in particular allows AI Backlink Builder to collect the likes of competitor backlink data and improve Google prospecting data with valuable metrics like Authority Score and Domain Traffic.
- Custom fields: See the custom fields that appear when you are editing your email templates and add new ones if you have more specific requirements for your outreach campaigns.