The Listing Management tool automatically distributes and maintains the accuracy of your business information in the most important directories.
This means your name, address, and phone number (NAP) will stay consistent across the web. And wherever customers search, you’ll get discovered—including voice and AI-search features.
In local SEO, these online references are often called citations. A citation is any mention of your business’s NAP across the web. Some citations may include additional details: operating hours, accepted payment methods, or images and videos.
Directory examples include Foursquare, Facebook, Yellow Pages, Yelp, Tripadvisor, Alexa, and Bing. But usually you have tens of relevant directories in each location.
The Listing Management tool allows you to
- Connect your GBP or enter business information manually once to see it distributed in all the relevant directories.
- Distribute any information updates to all the directories with one click.
- Track and suppress duplicates. Usually, duplicates appear with malicious intent.
- Manage user suggestions.
This tool is for you if your business is based in the following regions:
- 🇨🇦 Canada
- 🇲🇽 Mexico
- 🇺🇸 United States
- 🇦🇷 Argentina
- 🇧🇷 Brazil
- 🇨🇱 Chile
- 🇨🇴 Colombia
- 🇪🇨 Ecuador
- 🇵🇪 Peru
- 🇦🇺 Australia
- 🇳🇿 New Zealand
- 🇦🇹 Austria
- 🇧🇪 Belgium
- 🇧🇬 Bulgaria
- 🇭🇷 Croatia
- 🇨🇾 Cyprus
- 🇨🇿 Czechia
- 🇩🇰 Denmark
- 🇪🇪 Estonia
- 🇫🇮 Finland
- 🇫🇷 France
- 🇩🇪 Germany
- 🇬🇷 Greece
- 🇭🇺 Hungary
- 🇮🇸 Iceland
- 🇮🇪 Ireland
- 🇮🇹 Italy
- 🇱🇻 Latvia
- 🇱🇹 Lithuania
- 🇳🇱 Netherlands
- 🇳🇴 Norway
- 🇵🇱 Poland
- 🇵🇹 Portugal
- 🇷🇴 Romania
- 🇷🇸 Serbia
- 🇸🇰 Slovakia
- 🇸🇮 Slovenia
- 🇪🇸 Spain
- 🇸🇪 Sweden
- 🇨🇭 Switzerland
- 🇺🇦 Ukraine
- 🇬🇧 United Kingdom
- 🇧🇩 Bangladesh
- 🇭🇰 Hong Kong
- 🇮🇳 India
- 🇮🇩 Indonesia
- 🇯🇵 Japan
- 🇲🇾 Malaysia
- 🇳🇵 Nepal
- 🇵🇰 Pakistan
- 🇵🇭 Philippines
- 🇸🇬 Singapore
- 🇹🇭 Thailand
- 🇻🇳 Vietnam
- 🇰🇪 Kenya
- 🇳🇬 Nigeria
- 🇿🇦 South Africa
- 🇮🇱 Israel
- 🇸🇦 Saudi Arabia
- 🇹🇷 Turkey
- 🇦🇪 United Arab Emirates
What directories are there in the Listing Management tool?
Listing Management provides an extensive list of online directories across various countries. The tool has 100+ unique directories available (global and local). The exact list of listings will depend on your location.
Listing in the selected directories improves your local SEO and visibility, helps you build credibility online, and increases your coverage.
- Global directories like Google Business Profile, Bing, Foursquare, and Facebook ensure widespread reach, while regional directories target localized audiences.
- Navigation services (Waze, TomTom, HERE WeGo) and voice search platforms (Amazon Alexa, Google Assistant, and Microsoft Cortana) benefit users on the go.
- Some of these directories, including OpenAI, cover popular AI tools.
There are also some unique or prominent listings in specific regions. These local directories can offer an extra edge for businesses targeting customers in that market.
Examples include Das Örtliche, Gelbe Seiten, Meinestadt.de, Marktplatz-Mittelstand, BundesTelefonbuch in Germany; Scoot, 192.com, The Mirror, Daily Record, The Scotsman in the United Kingdom; Citysearch, YellowPagesDirectory, CitySquares, USCity in the US, and more.
The Value of Listing Management
The more consistent your citations, the more reliable your business information appears to consumers and search engines.
- Authority: Google checks your business information across the web. Its accuracy and consistency are important factors for local search results. Some directories play a critical role in signaling the authority of your business to Google. Listing on these platforms helps search engines verify your business’s credibility and trustworthiness.
- Engagement: Customers use a variety of directories to find information about your business, not just Google. Some of these are high-traffic and can potentially bring you more customers. They include Yahoo, Tripadvisor, voice search, AI search, and other listings.
- Navigational Listings: Directories like Foursquare, the Yellow Pages Network, and GPS networks help people get directions to your business. Ensuring accurate information on these platforms can drive foot traffic to your physical locations.
- Malicious listings: There are things like spam and duplicates to keep in mind. Removing them from the web also improves your performance in local search. You can suppress such duplicates with one click.
- Time-intensity and human error: Keeping your information up-to-date across tens of directories is challenging if done manually. Errors can ruin your information's accuracy, consistency, and trustworthiness, thus affecting your local rankings.
Run a free scan to get a glance at your overall online presence

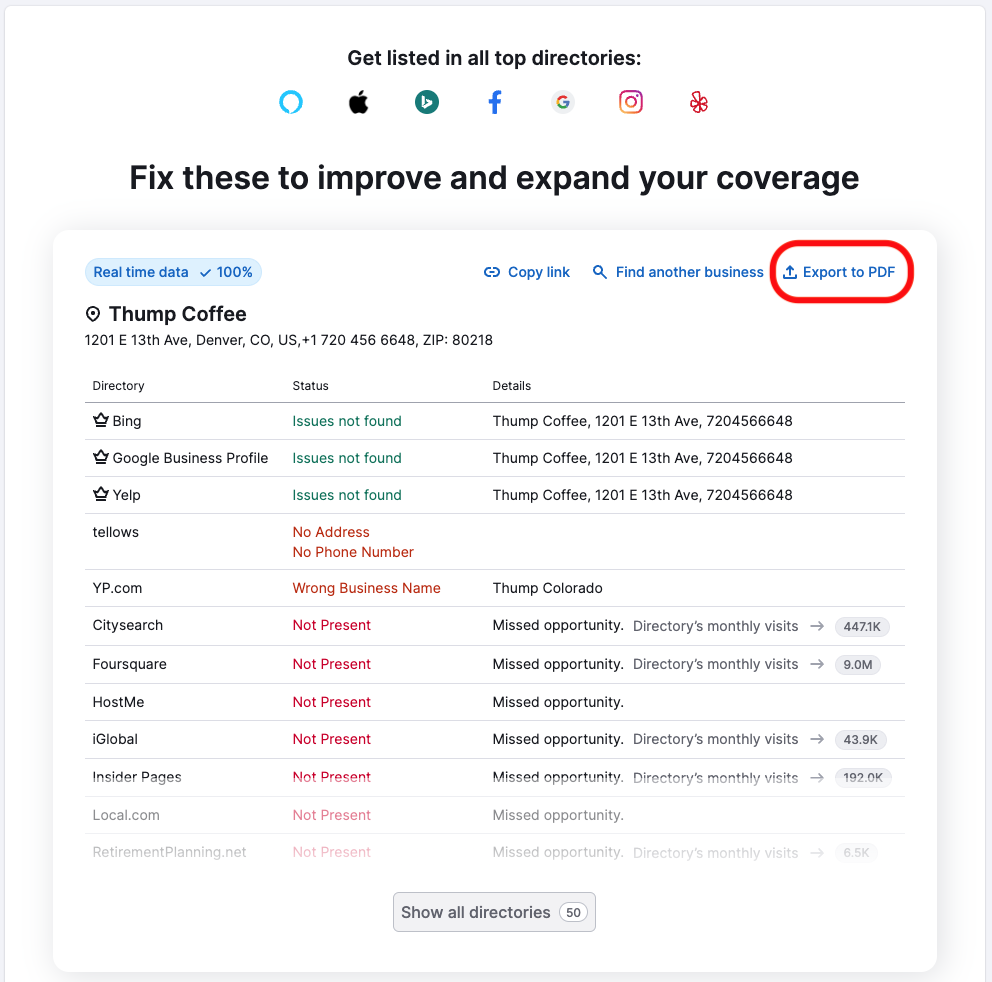
First, you can get a free report by selecting your business or manually entering an address. It’s the first thing you see in the Listing Management tool if you haven’t used it previously.
Please note that this is a preliminary report. Some listings or reviews might not get discovered during this initial scan.
Its goal is to evaluate the overall state of your online presence and spot the potential quick fixes.
You can copy the results link and export the data if you have a Semrush subscription. This is a great way to see improvements to your initial online presence after using the Listing Management tool.

How Listing Management works
Please note that you must purchase at least one Location to work with Listing Management. After that, you can also access Google Business Profile Optimization (including historical performance insights), Review Management, and the Map Rank Tracker. Learn more about Semrush Local plans.
Put simply, there are three steps to how Listing Management works:
- First, you set up a location. This means adding all the business info and relevant data like NAP and working hours.
- Second, the Listing Management tool automatically distributes that data to all the directories.
- Third, after the information is distributed, Listing Management maintains accuracy, implements your edits, monitors directories for duplicates, gathers user suggestions, and provides you with ranking information.
And you control and manage all your listings in one place.
Your business data is distributed automatically to the most authoritative directories
During the setup process, you will have two options for setting up your location.
One is connecting your Google Business Profile. The other is filling in your business information manually.
This will include NAP (name, address, and phone number), website, primary and secondary categories, business description, and working hours.
On top of the basic information, in the later stages, you can use Listing Management to distribute your logo, photos, and visuals across the web.
After you set up your location, it will take some time to verify your information and distribute it to directories.
If you need help connecting your GBP or Facebook to Semrush Local, visit this article.
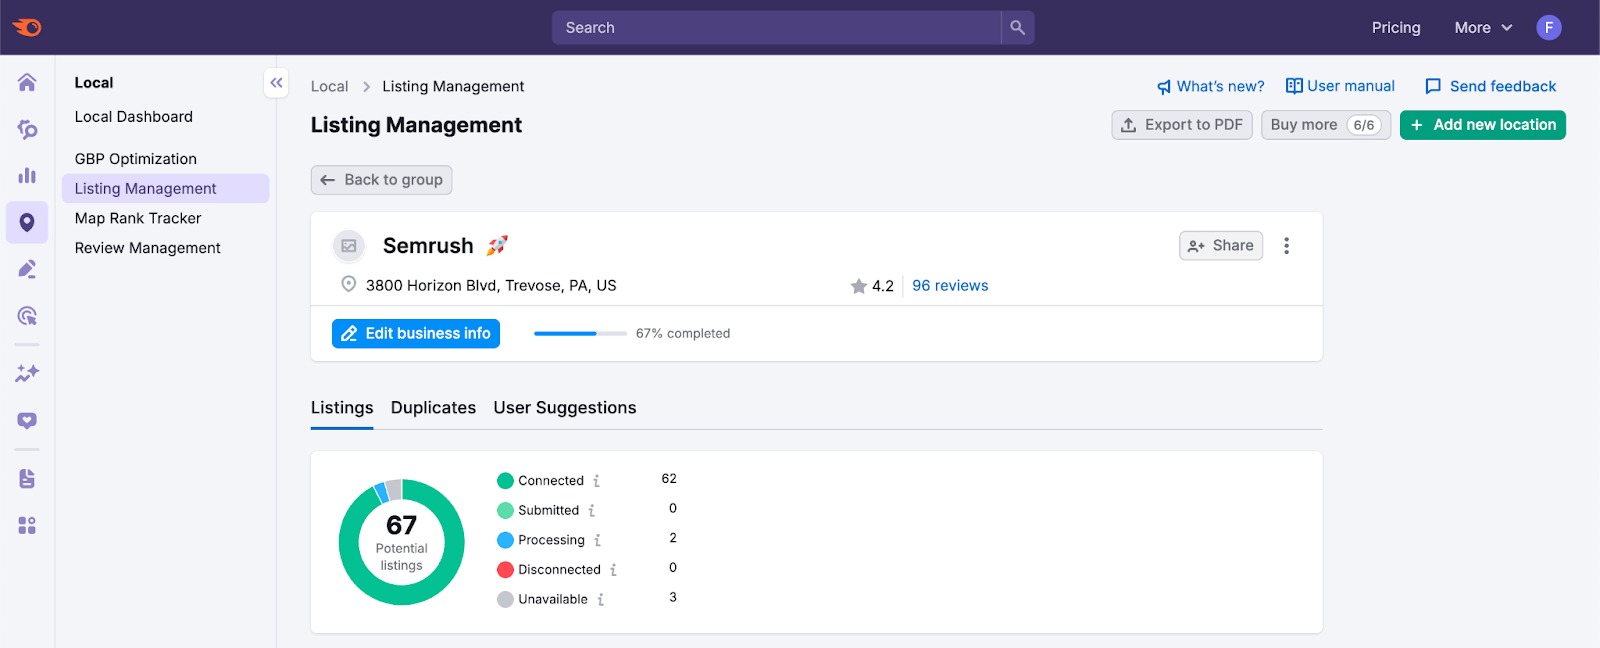
No additional action is required in most cases. Your business information will be distributed and maintained. You will see the statuses in this widget:

The Structure of the Listing Management Tool
Making sure your data is sent to the directories and listings once is just the first important step.
The Listing Management tool actively syncs your business info to maintain consistency. It also collects user suggestions, looks for new duplicates in all the directories, and displays your local ranking data.
Here’s how Listing Management is structured:
All the directories for your location and the status of your business information for each one. In some cases, there are also direct links to see your listing.
The Listing Management tool monitors all the directories to see if any potential duplicates appear. Often, duplicates that appear without your knowledge have some malicious intent.
Sometimes users suggest changing information that they feel is incorrect. You will see the suggestions in this tab and can easily approve or reject them.
Semrush Local Plans
To learn more about the features included in Semrush Local plans, check out this article.